This document assumes that you have an Internet connection already present.
Please follow the instructions below to configure Windows XP to connect to UBC's VPN service.
Creating a New VPN Connection:
- Select Start ->Settings -> Control Panel
- Select Network and Internet Connections if you cannot see the adapters immediately, you will need to click on Network Connections.
- Under Network Tasks click Create a new connection.
- The Welcome to the New Connection Wizard screen will open.
- Click Next to access the Network Connection Type dialog box.
- Select the Connect to the network at my workplace radio button.
- Click Next to continue.
- Select the Virtual Private Network connection radio button.
- Click Next to continue.
- For Company Name, type: UBC VPN
- Click Next to continue.
- If you have dial-up or a previous profile, select the Do not dial the initial connection radio button.
- Click Next to continue.
- For Host name or IP address:
- If you are associated with the UBC-Vancouver campus, type: vpn.ubc.ca
- If you are associated with the UBC-Okanagan campus, type: vpn.ok.ubc.ca
- Click Next to continue.
- In the Completing the New Connection Wizard dialog box, place a tick next to Add a shortcut to this connection to my desktop.
- Click Finish to continue and the Connection window should be displayed.
- Click the Properties button to configure some importantsecurity settings.
- Click on the Security tab.
- In the Properties dialog box, select Advanced (custom settings) and click the Settings button.
- Under "Data encryption:", ensure that Require encryption (disconnect if server declines) is selected from the drop down menu.
- Under "Allow these protocols", uncheck Microsoft CHAP (MS-CHAP) and place a checkmark next to Microsoft CHAP Version 2 (MS-CHAP v2) to turn it on.
- Click OK to save these settings and to exit the "Advanced Security Settings" window.
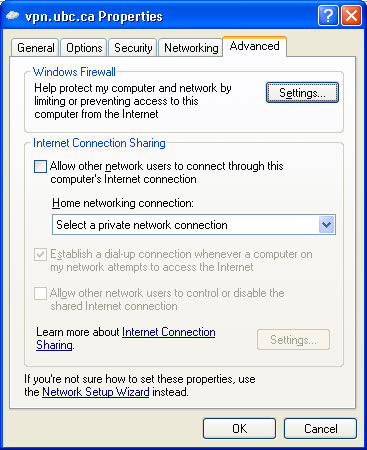
- Click on the Advanced tab to continue.
Firewall Set-up Instructions for Windows XP (Service Pack 2)
- We seriously recommend that you turn on the Internet Connection Firewall.
- Next to Help protect my computer and network by limiting or preventing access to this computer from the Internet, click the Settings button to continue.
- Ensure that your Windows Firewall is set to On.
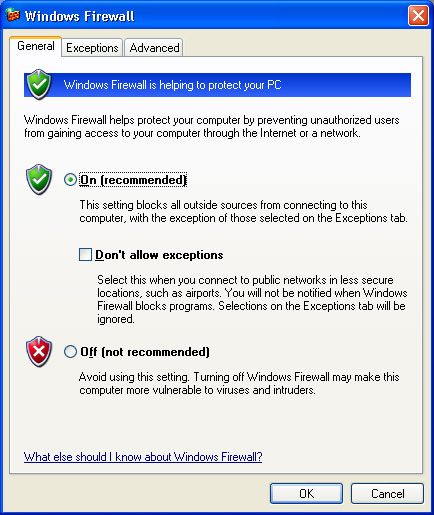
- Click on the Advanced tab to modify the firewall settings.
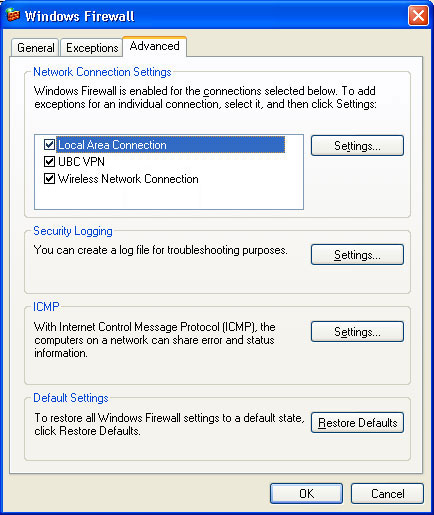
- Select the Settings... button under the ICMP section
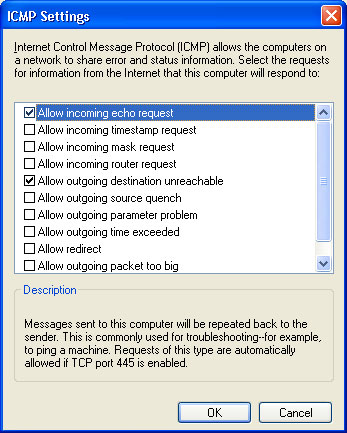
- Place a tick next to Allow incoming echo request.
- Place a tick next to Allow outgoing destination unreachable.
- Click the OK button to exit the ICMP Settings window.
- Click the OK button to exit the Windows Firewall Settings window.
- Click the OK button to exit the VPN Properties window.
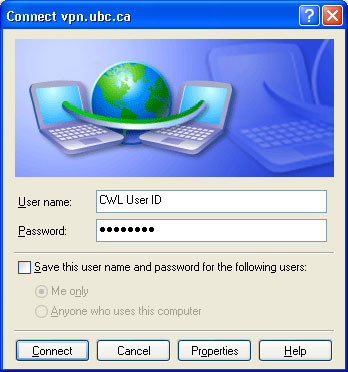
- Enter your Campus-Wide Login (CWL) and password and click Connect to establish your VPN connection.
- A Network Connection icon will appear in the lower right hand corner of the Windows taskbar when the connection has been established.
- To see information about your wireless VPN connection or to disconnect your wireless VPN connection, double click on the UBC VPN icon on your desktop.
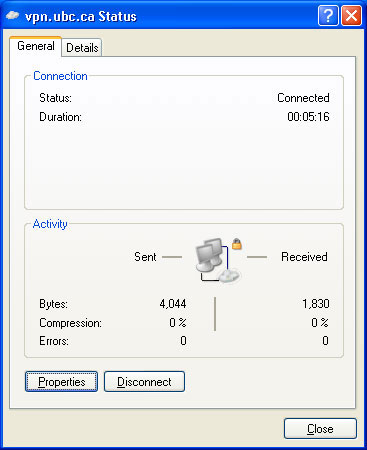
- Click on the Details tab for more information.
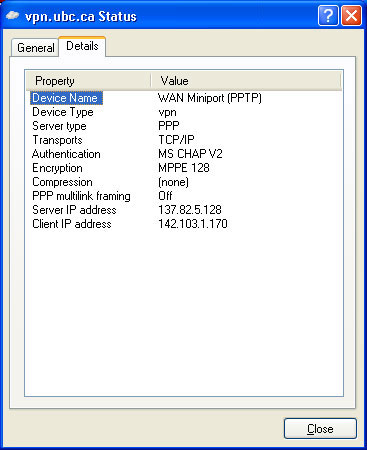
- At this point, all traffic is tunneled back to UBC (and from there, information is unencrypted.)
- If you are experience problems connecting to UBC VPN using Windows XP's built-in VPN application, you can also try the Nortel IPSec application.
