Unfortunately, there is no easy way to approve message on a moderated mailing list using Majordomo. It involves a lot of copying, cutting and pasting to get it working properly. Moderated lists are not recommended due to the complicated nature of the approval process. Problems also arise if you want to approve a message containing an attachment. Although it is possible to get it to work, it isn't straightforward and the body of the message is also delivered as an attachment which might be a little confusing for list members at first.
If someone posts to a moderated list, the message will bounce to the Administrator. The mailing list Administrator would then have to strip out the inappropriate headers and send it to the list with a command to approve its delivery. If someone sends an attachment to a mailing list, it will also bounce to the Administrator but the attachment will be converted to what looks like garbled text. The Administrator would have to perform a similar procedure of copying, cutting and pasting to get a message with an attachment to be delivered properly.
Please note the following:- Depending on your email client, the menu items may vary slightly (e.g. "paste without formatting" in Thunderbird is "Paste Special" in Outlook).
- The screenshots contained some information blanked out (sender email).
- Depending on the message being approved, the exact text of the email messages will vary.
Moderating the List and Setting the Mailing List Password
To set the mailing list password, including an "approved" password, you must follow this procedure:
- Login to the Mailing List Management Utility
 on the Interchange website using your CWL username and password.
 - Select the mailing list that you want to modify from the drop down menu under Choose a List and click Edit.
- If you have not already made the list moderated, choose the Options tab. Under Policy Options, set Moderated to Yes.

- Choose the Admin tab. Set an Admin Password and an Approve Password. Click on Update Passwords.
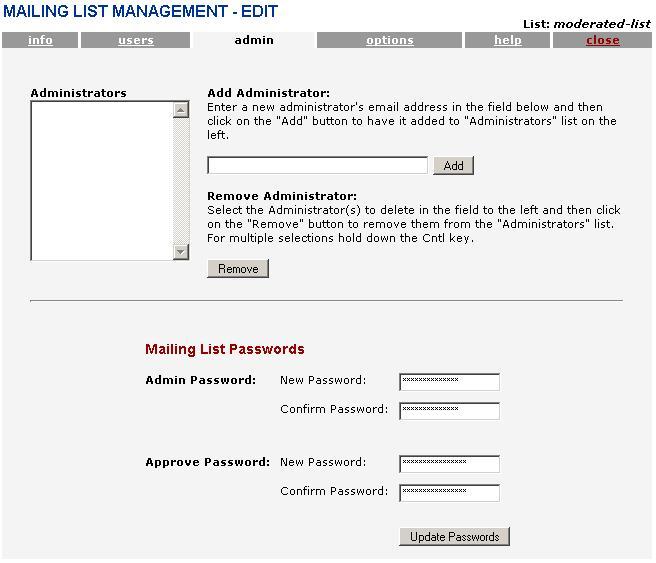
- You will need to use the Approve Password that you just set to approve messages to the list in the future.
To approve a message that has been bounced to you (the List Administrator), you must follow this procedure:
Approving a Message without an Attachment
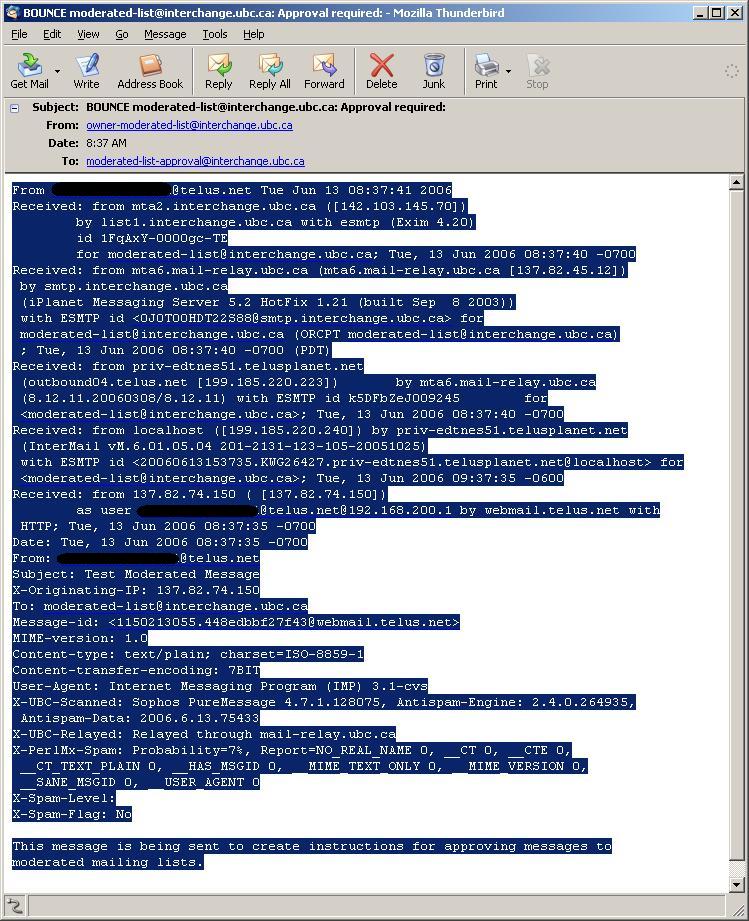
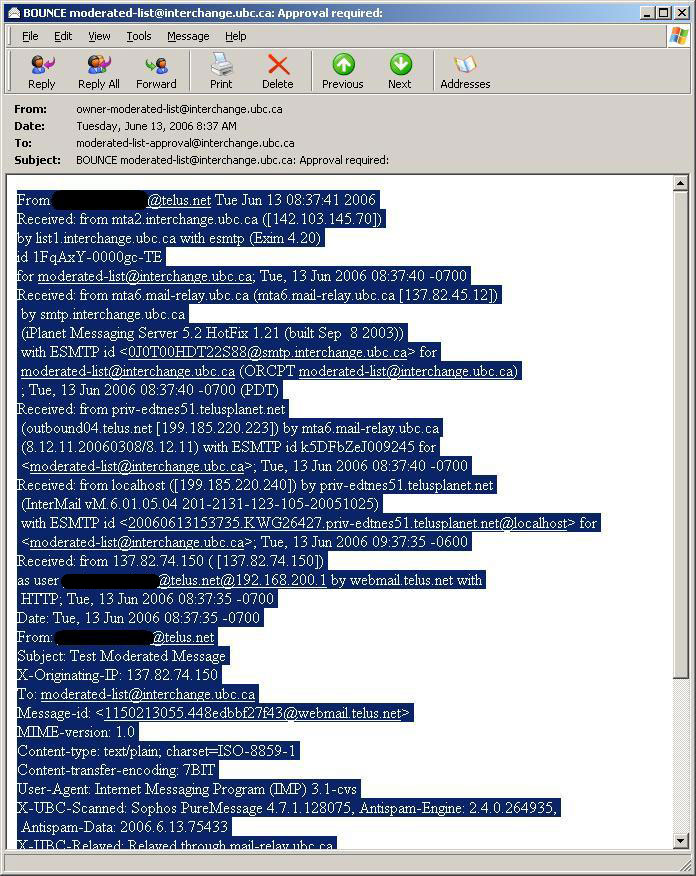
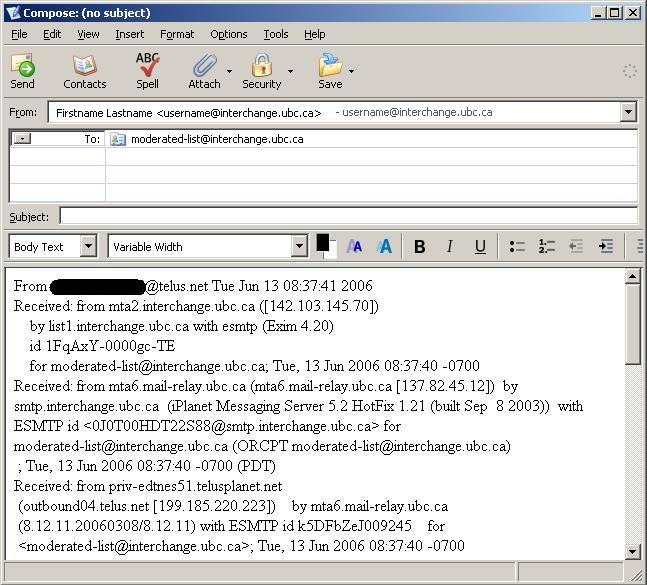
- Select the whole body of the message and go to the Edit menu and select Copy. Be sure to include ALL of the headers.
- Click for a Mozilla Thunderbird 1.x screenshot of this step.
- Click for a Outlook 2003 screenshot of this step.
- Click for a Outlook Express 5/6 screenshot of this step.
- Create a new message and address it to your mailing list address.
- Leave the subject blank.
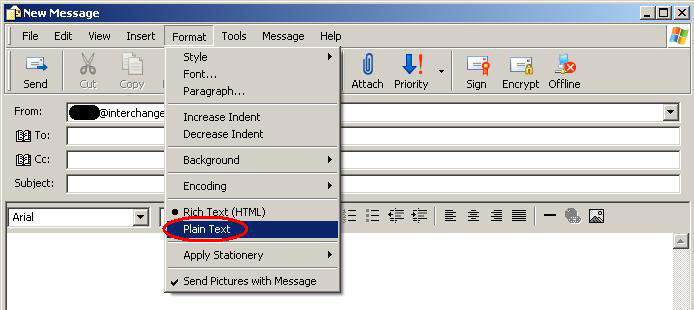
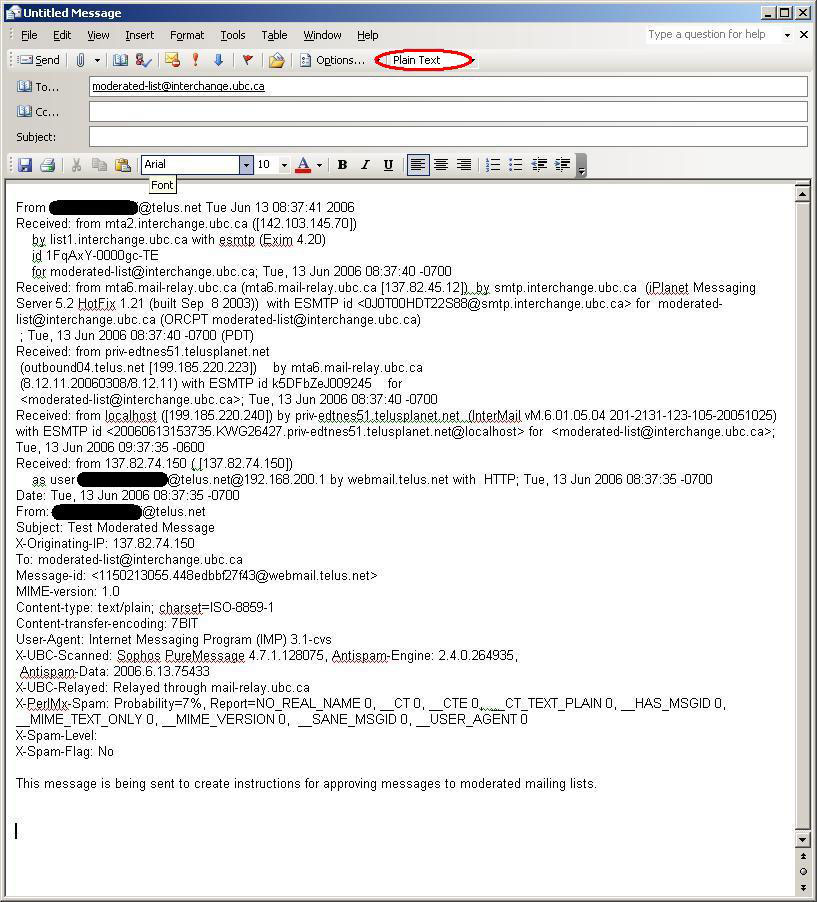
- Ensure that you are using Plain Text format. The exact instructions at this point vary. If you are uncertain how to configure your email client to send the message in Plain Text, please see here for instructions.
- Click for a Mozilla Thunderbird 1.x screenshot of this step.
- Click for a Outlook 2003 screenshot of this step.
- Click for a Outlook Express 5/6 screenshot of this step.
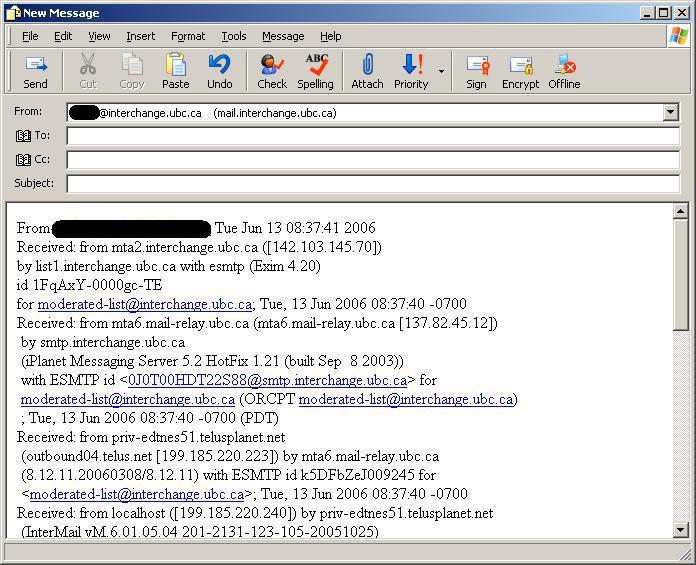
- Paste what you copied into the body of the new message.
- Click for a Mozilla Thunderbird 1.x screenshot of this step.
- Click for a Outlook 2003 screenshot of this step.
- Click for a Outlook Express 5/6 screenshot of this step.
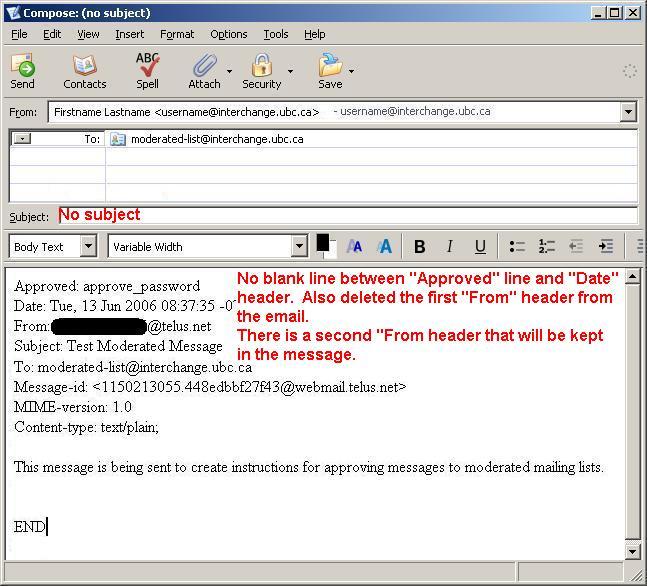
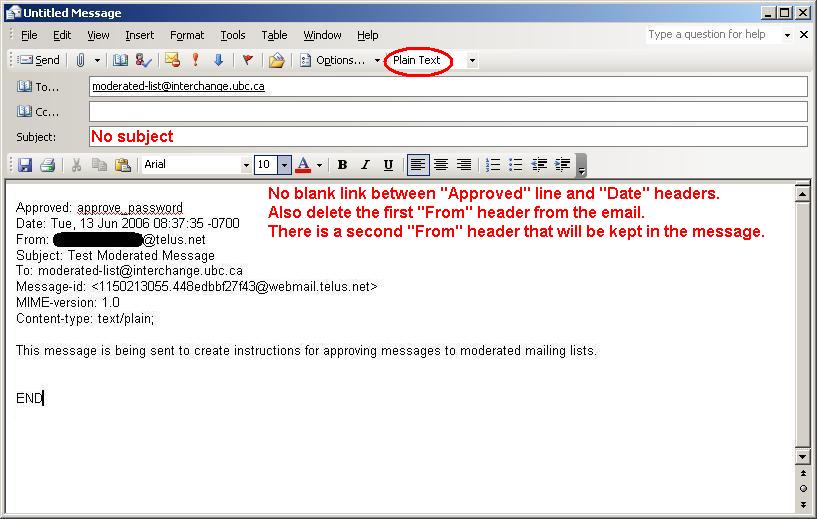
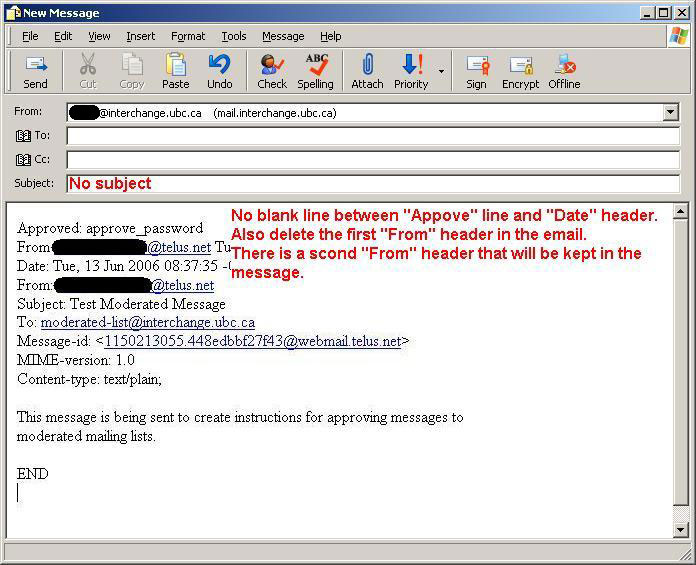
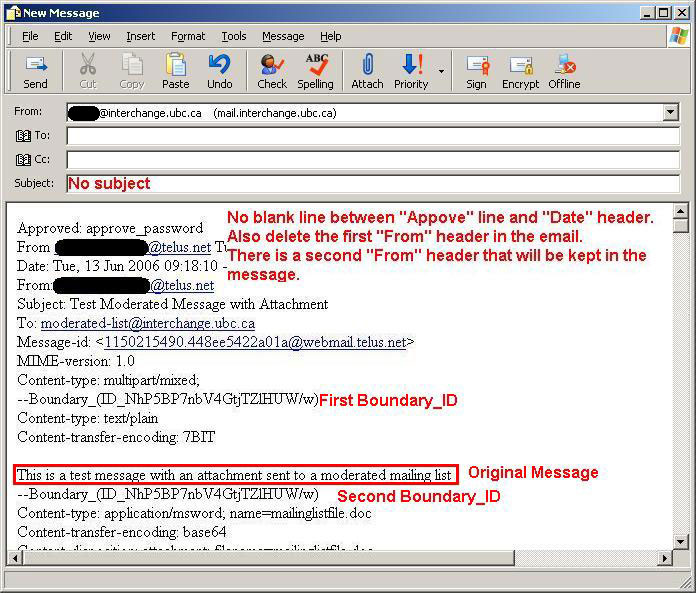
- Make 'Approved: mailinglist-password' the very first line of your new message. 'mailinglist-password' is your mailing list's Approve password. This can be set using the Mailing List Management Utility on the Interchange website.
- Ensure that there is no blank line between the approved line and the headers.
- Now delete first line of the headers (i.e. From mailinglistmember@hotmail.com...)
- Delete all of the "Received:" headers. Once these have been deleted, the first line of the headers (the line after the "Approved" line) should start with "Date:"
- Go down (about 10 lines) to the first line that starts with "Content-type:". There may be multiple so be sure to find the first occurrence. On this line, you'll see a semi-colon. Delete everything after the ; symbol on this line up to and including the "X-OriginalArrivalTime" line or the "X-Spam-Level" header, whichever comes first.
- Remove all remaining "X-_____" headers such as X-MIMEOLE, X-Mailer, X-Originating-IP, X-Sender, etc... These may be below the "Content-type" line that was just removed, or they may between the "Subject" line and the "To" line.
- If everything after this is the body of the message, then you can send the message and it should get delivered to the customer. You may want to add an END command on the very last line of the message so that your signature (if you have one) doesn't get into the message.
- Click for a Mozilla Thunderbird 1.x screenshot of this step.
- Click for a Outlook 2003 screenshot of this step.
- Click for a Outlook Express 5/6 screenshot of this step.
Additional Instructions - Approving a Message with an Attachment
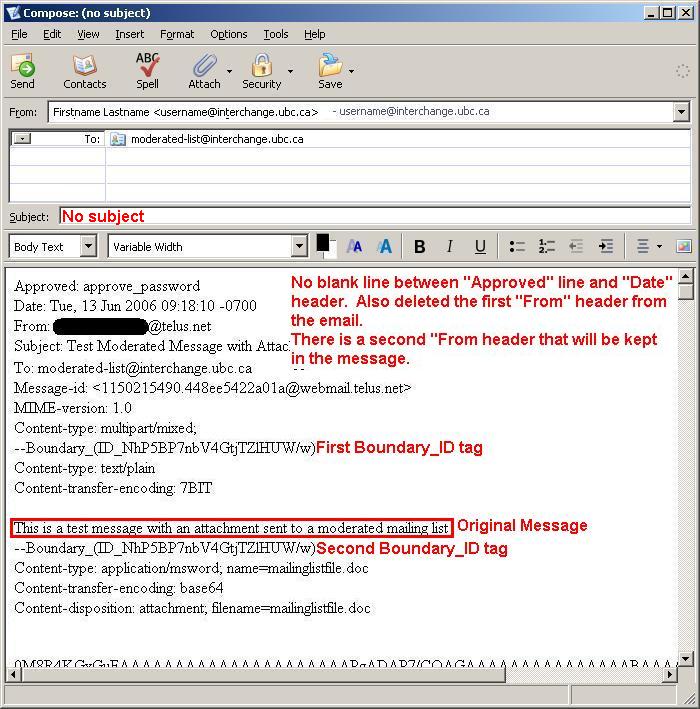
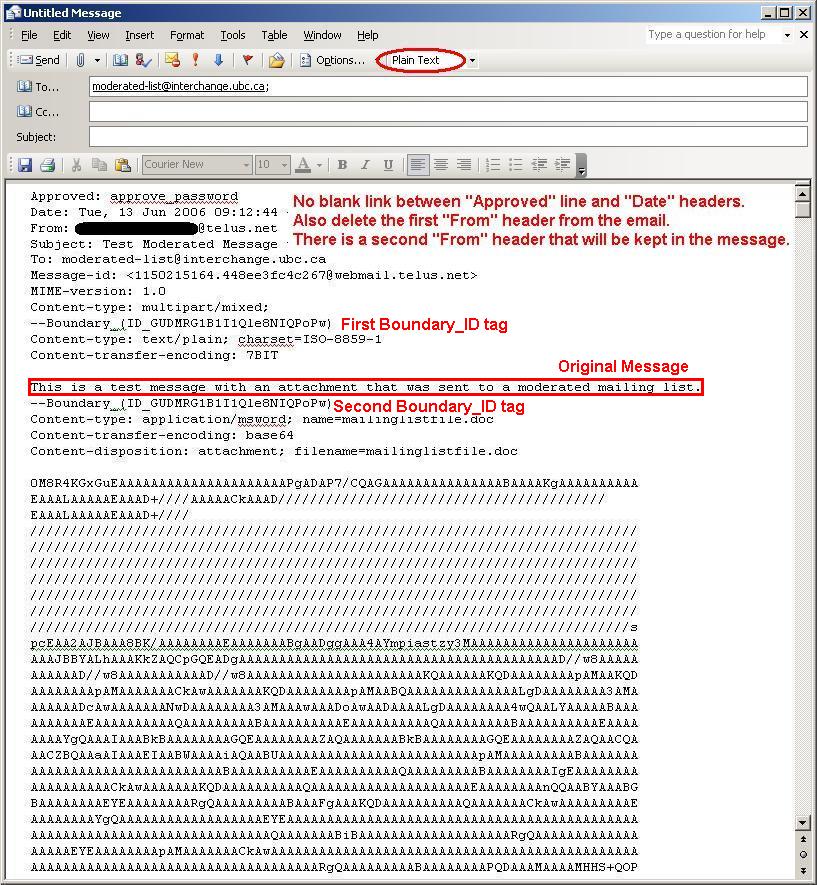
If there is an attachment to the message that you want to approve, you must do the following steps as well as the instructions above:
- Remove the line "This is a multi-part message in MIME format." if it exists, along with the blank lines above and below it.
- Leave one blank line before any text that was written by the mailing list member.
- Remove any blank lines after the text of the message by the list member so that there is no blank line between the list member's message and the next "--Boundary-" header.
- You may want to add an END command on the very last line of the message so that your signature (if you have one) doesn't get into the message.
- Leave the rest as is and send the message. It should get delivered to the mailing list with the attachment intact. Note that the body of the message will also be an attachment. There may also be empty attachments included as well. Unfortunately, there's nothing that we can do about this as it's just the way that Majordomo works.
- Click for a Mozilla Thunderbird 1.x screenshot of this step.
- Click for a Outlook 2003 screenshot of this step.
- Click for a Outlook Express 5/6 screenshot of this step.
Examples - Text Based
An approved message without an attachment should look something like this:
Address the message to: yourlist-name@interchange.ubc.ca
Leave the subject blank.
The body of the message should look something like this:Approved: yourlist-password
Date: Thu, 08 Dec 2005 15:52:43 -0800
From: John Smith
Subject: Hello World
To: yourlist-name@interchange.ubc.ca
Message-id:
MIME-version: 1.0
Content-type: text/plain;
This is the body of the message with no attachment.
END
An approved message with an attachment should look something like this:
Address the message to: yourlist-name@interchange.ubc.ca
Leave the subject blank.
The body of the message should look something like this:Approved: yourlist-password
Date: Thu, 08 Dec 2005 15:52:43 -0800
From: John Smith
Subject: Hello World
To: yourlist-name@interchange.ubc.ca
Message-id:
MIME-version: 1.0
Content-type: multipart/mixed;
--Boundary_(ID_HM5QzPrY+ayuItW7OqATJQ)
Content-type: text/plain; charset=us-ascii
Content-transfer-encoding: 7BIT
This is the body of the message with an attachment.
--Boundary_(ID_HM5QzPrY+ayuItW7OqATJQ)
Content-type: image/jpeg; name=testimage.jpg
Content-transfer-encoding: base64
Content-disposition: attachment; filename=testimage.jpg
/9j/4AAQSkZJRgABAgEBLAEsAAD/7Q9uUGhvdG9zaG9wIDMuMAA4QklNA+0AAAAAABABLAAAAAEA
AQEsAAAAAQABOEJJTQQNAAAAAAAEAAAAHjhCSU0EGQAAAAAABAAAAB44QklNA/MAAAAAAAkAAAAA
AAAAAAEAOEJJTQQKAAAAAAABAAA4QklNJxAAAAAAAAoAAQAAAAAAAAACOEJJTQP1AAAAAABIAC9m
--Boundary_(ID_HM5QzPrY+ayuItW7OqATJQ)
END
Additional Information - How to Send a Message in Plain Text Format
The instructions below outline how to send a message in Plain Text format using various email clients.
Mozilla Thunderbird 1.x- To paste without formatting: Under the Edit menu, choose the Paste Without Formatting command to paste your message.
- To send the message in plain text: Under the Options menu, choose Format and then Plain Text Only.
- To paste without formatting: Under the Edit menu, choose the Paste Special command, and then select Unformatted Text in the window that appears. Click OK.
- To send the message in plain text: At the top of the message window, you will see a drop down box, most likely currently set to HTML. Change this to Plain Text.
- To send the message in plain text: Under the Format menu, choose Plain Text.
These instructions outline how to set up Eudora to prompt you on whether to send a plain text message or HTML message each time you send a message.
- Go to Tools and select Options.
- Click on the Styled Text category.
- Choose Send both plain and styled.
- Check the box Ask me each time.
Mac OS Mail 1.3.x and Up
- To send the message in plain text: With the message open, go to Format and choose Plain Text.
- To send the message in plain text: Under the Format menu, ensure that HTML is unchecked.
