This document refers to Windows XP (with SP2) and Mac OSX 10.4 only. Please refer to your
manufacturer's documentation to find out how to perform these tasks for your device.
Selecting a Wireless Network
Windows XP
- Turn on or enable your wireless card (see manufacturer's documentation for more details).
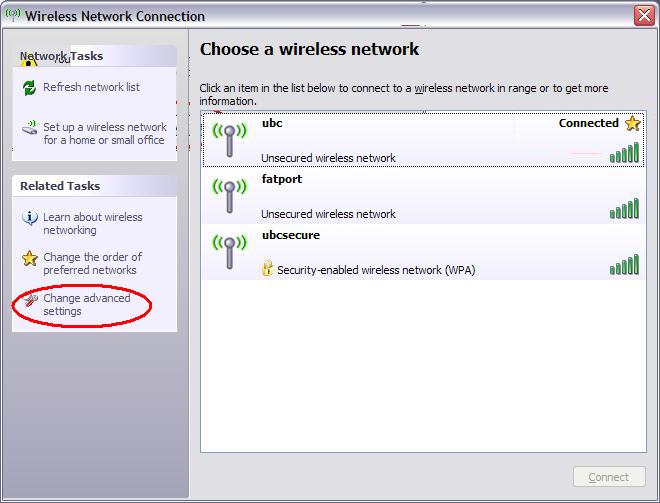
- Double click on the wireless icon in your System Tray at the bottom right hand corner
of your desktop.

- If you are already connect to a wireless network, click the View Wireless
Network button.
If you are not already connected to a wireless network, proceed to the next step.

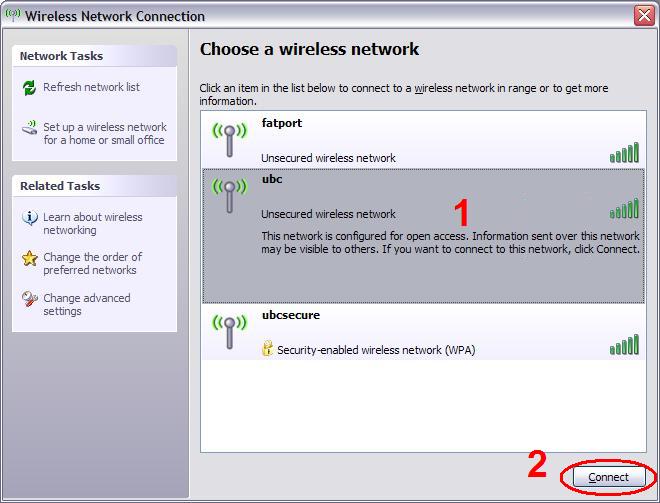
- Select the wireless network you want to connect to and then click the
Connect button.
For more information on how to connect to "ubcsecure" please see the ubcsecure (WPA) section.
For more information on how to connect to “FatPort (Non-UBC user)” please see the FatPort Wireless section .
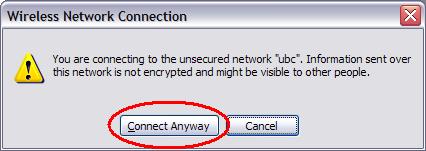
- If you are connecting to an "open" network, you might get the following window. If so,
click Connect Anyway.
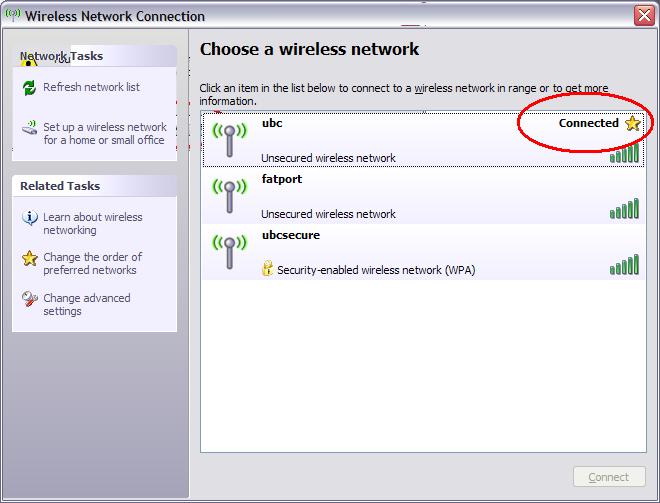
- After a few moments you will then be connect to the wireless network you selected
earlier.
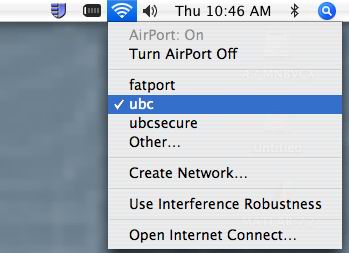
Mac OS X
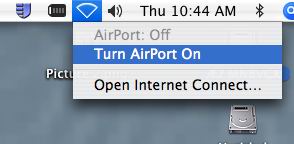
- Turn on or enable your AirPort wireless card by clicking on the Airport icon at the top
right corner and selecting Turn AirPort On.
- Click on the AirPort icon again and select the network you want to connect to.
For more information on how to connect to "ubcsecure" please see the ubcsecure (WPA) section.
For more information on how to connect to “FatPort (Non-UBC user)” please see the FatPort Wireless section .
- You will now be connected to the wireless network you selected.
Prioritizing Wireless Networks
This section explains how to change the priority of the wireless network profiles saved in your computer.
When your computer connects to a wireless network, a profile of it will be saved on your computer. By default the newest wireless network you connected to last is the one that has the highest priority. You can change the priority or order of wireless networks that your computer will try connecting to by following the steps below.
Windows XP
- Double click on the wireless icon in your System Tray at the bottom right hand corner
of your desktop.
- Click the View Wireless Network button.
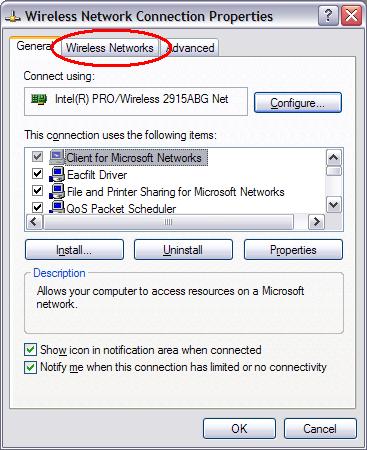
- Click the Change advanced settings link.
- On the next windows, click the Wireless Networks tab at the top.
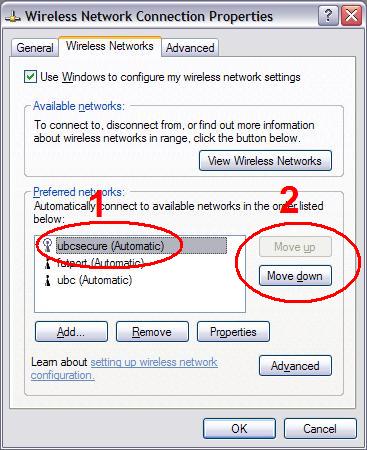
- In the list of Preferred networks, you can change the priority of the
network you want to connect to by selecting a wireless network and using the Move
up or Move down buttons. Note that the one at the top of the list
has the highest priority; in other words, your computer will try to connect to that one
first.
- When you are finished, click the OK button below. Note that your
computer may disconnect you from your current wireless connect and reconnect to a wireless
network with a higher priority.
Mac OS X
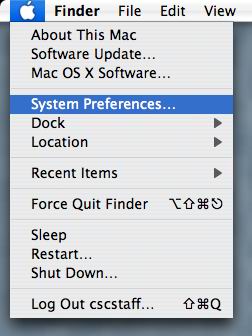
- Click the Apple icon at the top left corner of your desktop and select System
Preferences.
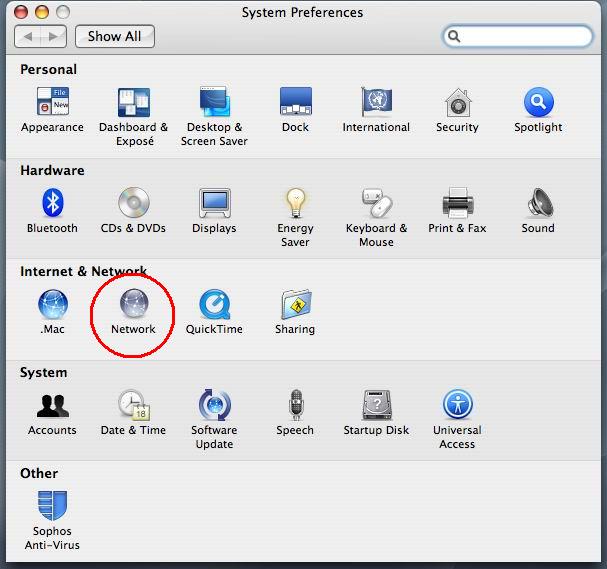
- Click the Network icon.
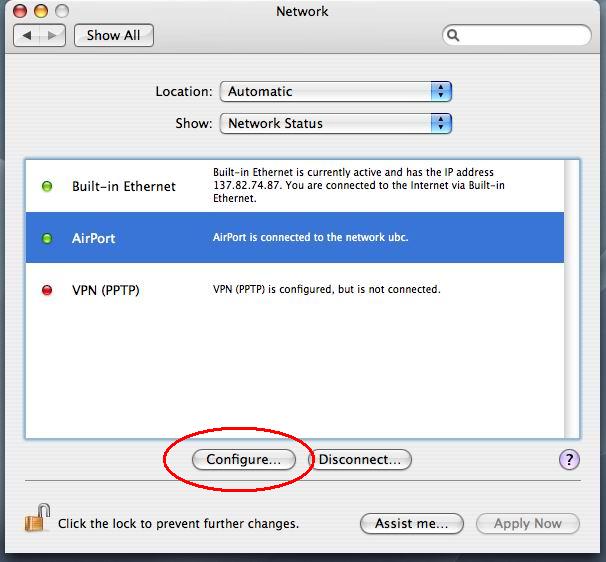
- Select AirPort and click the Configure button at the
bottom.
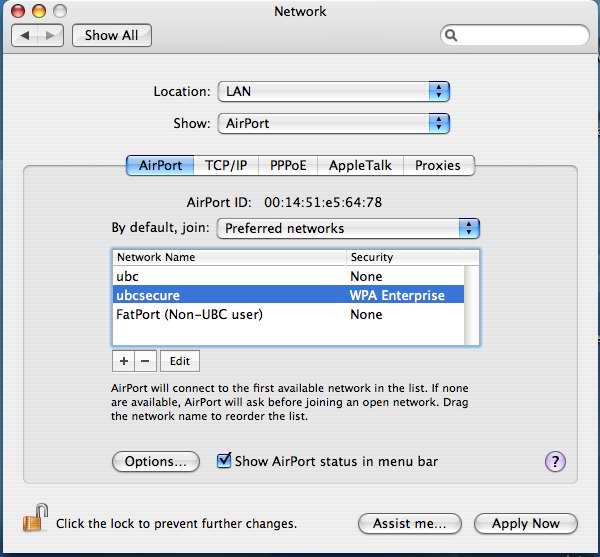
- In the list of networks, you can change the priority of the network you want to connect
to by selecting and dragging the wireless networks into the order that you want. Note that
the one at the top of the list has the highest priority; in other words, your computer will
try to connect to that one first.
- When you are finished, click Apply Now. Note that your computer may
disconnect you from your current wireless connect and reconnect to a wireless network with
a higher priority.
