This document explains how to set up Mail 1.3.9 on a Mac for Netinfo/Interchange using Secure IMAP (IMAPS).
- First open the Mail application. The Mail application can be found in your Applications folder or by default in the Dock (the bar at the bottom of your screen.)
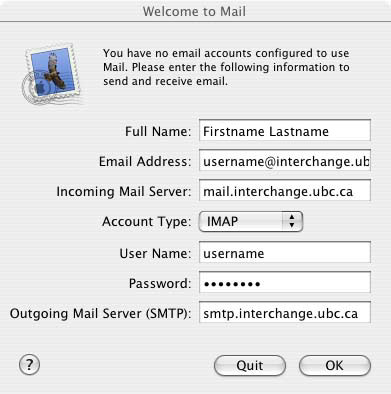
- If you are presented with a "Welcome to Mail" dialogue box, fill in the settings as follows. If you do not see this dialogue box, skip to the next step.
- Type in your name in the Full Name field.
- Type in your email address in the Email Address field.
- Your email address is username@interchange.ubc.ca where username is your Netinfo/Interchange username.
- In the Incoming Mail Server box, type: mail.interchange.ubc.ca
- Set Account Type to IMAP.
- In the User Name box, enter in your Netinfo/Interchange username.
- Your username is the first part of your email address. If your email address is username@interchange.ubc.ca, then your username is username.
- Type in your Netinfo/Interchange password in the Password field.
- In the Outgoing Mail Server box, type: smtp.interchange.ubc.ca
- Click OK.
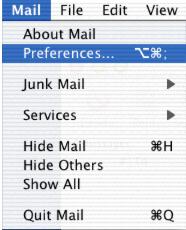
- Click on the Mail menu and select Preferences.
- Select Accounts if it is not already selected. Then under the Accounts window, click on + button and fill in the following information if it is not already filled in:
- Account Type should be set to IMAP.
- Set the Description to the name by which you'd like to refer to this account, for example Interchange.
- Type in your email address in the Email Address field.
- Your email address is username@interchange.ubc.ca where username is your Netinfo/Interchange username.
- Type in your name in the Full Name field.
- In the Incoming Mail Server box, type: mail.interchange.ubc.ca
- In the User Name box, enter in your Netinfo/Interchange username.
- Your username is the first part of your email address. If your email address is username@interchange.ubc.ca, then your username is username.
- Type in your Netinfo/Interchange password in the Password field.
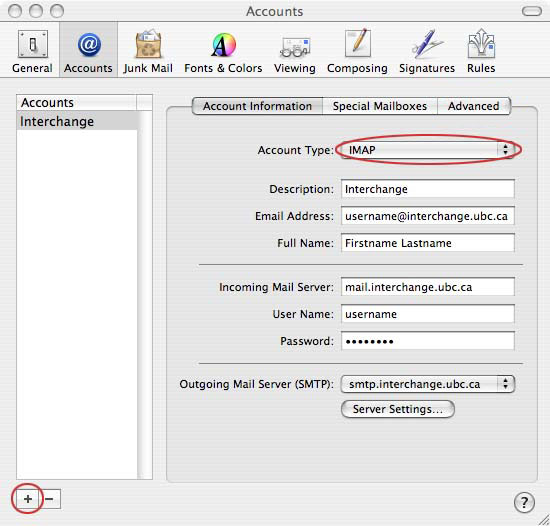
- To set up the Outgoing Mail Server (SMTP), click on the Server Settings... button.
- In the SMTP Server Options window:
- In the Outgoing Mail Server box, type: smtp.interchange.ubc.ca
- Click on the checkbox next to Use Secure Sockets Layer (SSL) to enable it.
- Change the Server port to 587.
- For Authentication, select Password.
- Enter your Netinfo/Interchange username and password for the User Name and Password fields.
- Click OK.
 ~
~
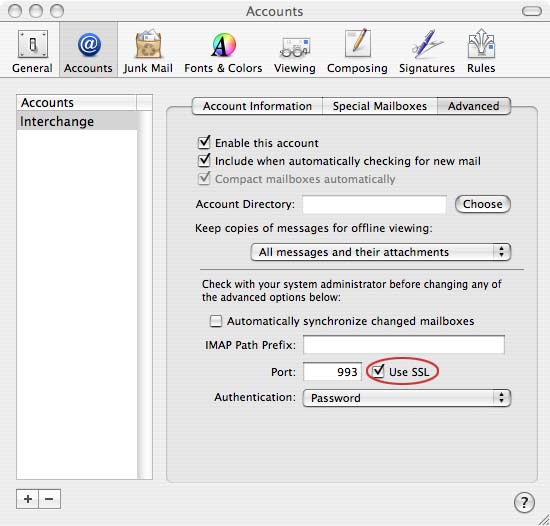
- Click on the Advanced tab.
- Add a checkmark beside Use SSL and it should automatically change the Port to 993.
- Ensure Password is selected from the Authentication pull-down menu.
- Mail is now set up and you may exit from the preferences window by clicking on the red circle on the top left hand corner of the Accounts window.
- You may be asked to save your settings in a prompt as shown below. Click on Save.
- Mail is now set up for use on the Netinfo/Interchange service.
