This document explains how to set up Outlook Express on a PC for Netinfo/Interchange using Secure IMAP (IMAPS).
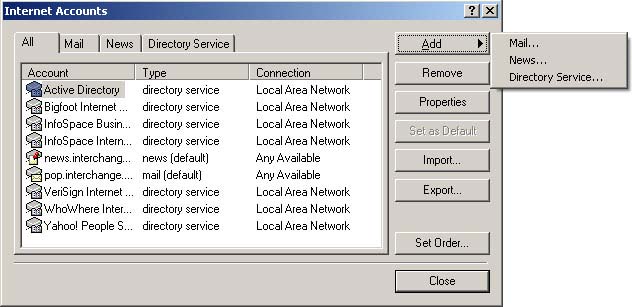
- In Outlook Express, pull down the Tools menu and select Accounts.
- A window will appear listing the mail, news and directory service accounts you have already set up. Click the button marked Add and select Mail to add a new mail account.
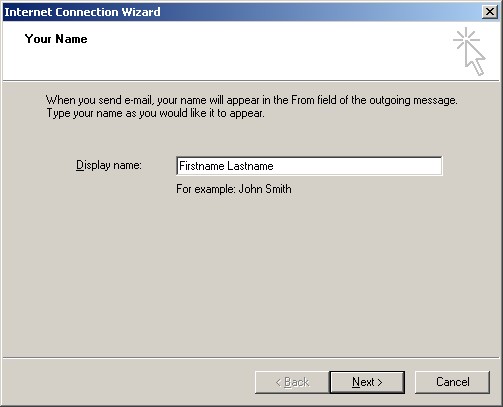
- In the Display Name box, enter in your full name. Click on Next to continue.
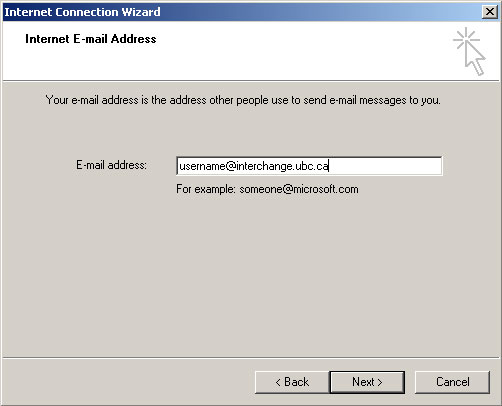
- Type your E-mail address, then click Next to continue.
- Your E-mail address is username@interchange.ubc.ca where username is your Netinfo/Interchange username.
- Your E-mail address is username@interchange.ubc.ca where username is your Netinfo/Interchange username.
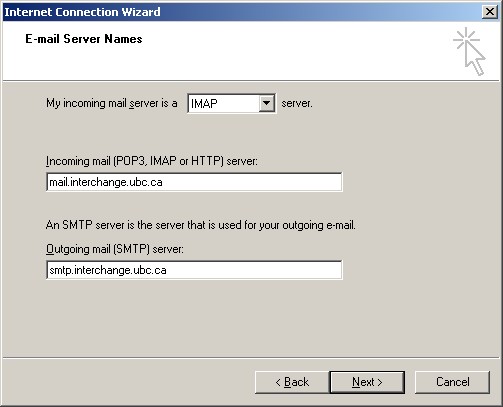
- In the E-mail Server Names window:
- For your incoming mail server, select IMAP from the drop down menu.
- The Incoming mail (POP3, IMAP or HTTP) server should be set to mail.interchange.ubc.ca
- The Outgoing mail (SMTP) server should be set to smtp.interchange.ubc.ca
- Click Next to continue.
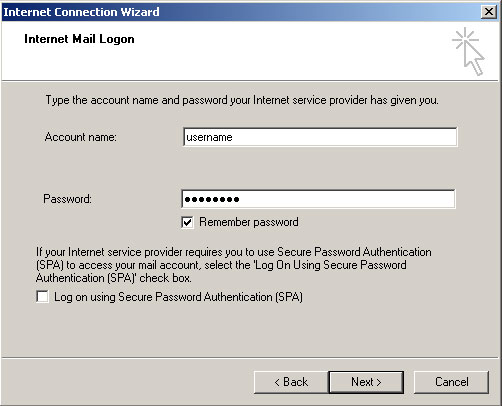
- In the Internet Mail Logon window:
- Your Account name should be set to your Netinfo/Interchange username.
- Your username is the first part of your email address. If your email address is username@interchange.ubc.ca, then your username is username.
- Your Password is your Netinfo/Interchange password.
- If you want Outlook to remember your password, put a checkmark in the box to the left of Remember password. If other people have access to your computer, you may wish to increase your security by not checking this box.
- Do *not* check the Log on using Secure Password Authentication (SPA) box.
- Click Next to continue.
- Your Account name should be set to your Netinfo/Interchange username.
- Click Finish to exit the wizard.
- You will be asked if you would like to download the folders from the newly added mail server. Click No.
- You will be brought back to the Internet Accounts window. Select your newly created mail account, and click Properties.
- On the General tab window:
- The Mail Account is the mail profile name. For the Mail Account, type in whatever you would like to refer to it as. ie. Interchange Account - IMAPS.
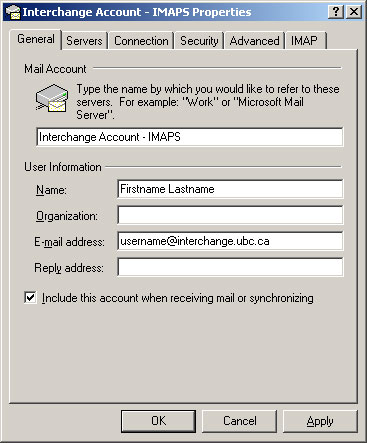
- The Mail Account is the mail profile name. For the Mail Account, type in whatever you would like to refer to it as. ie. Interchange Account - IMAPS.
- Select the Servers tab:
- Place a checkmark next to My server requires authentication.
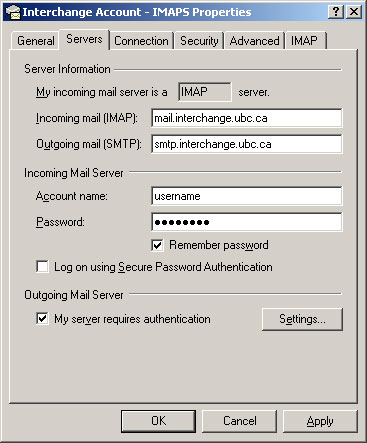
- Place a checkmark next to My server requires authentication.
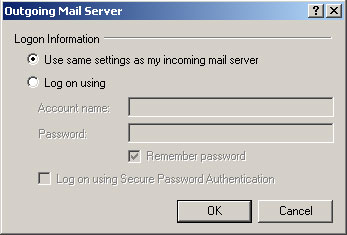
- Click the Settings... button.
- Select Use same settings as my incoming mail server.
- Click OK.
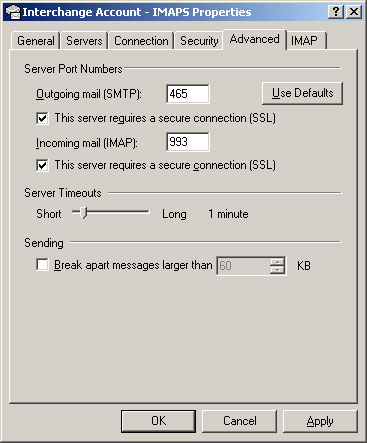
- Select the Advanced tab. On the Advanced tab screen:
- Under Outgoing mail (SMTP), check the box beside This server requires a secure connection (SSL).
- Change the number next to Outgoing mail (SMTP) to 465.
- Under Incoming mail (IMAP), check the box beside This server requires a secure connection (SSL).
- The number in the box next to Incoming mail (IMAP) server should automatically change to 993. If it doesn't, change the number in this box to 993.
- Click OK and then click Close.
- Click OK and then click Close. Outlook Express is now setup for use with Interchange/Netinfo.
- You will be asked if you would like to download the folders from the newly added mail server. Click Yes.
