This document explains how to set up Netscape Messenger 4.5 to 4.79 for Netinfo/Interchange using Secure IMAP (IMAPS).
Note: It is possible to set up a secure connection, but every time you start Netscape, you will be prompted for your username and password (once per session). If you want to avoid this issue, consider switching to an alternative mail client (e.g. Thunderbird or Outlook Express).
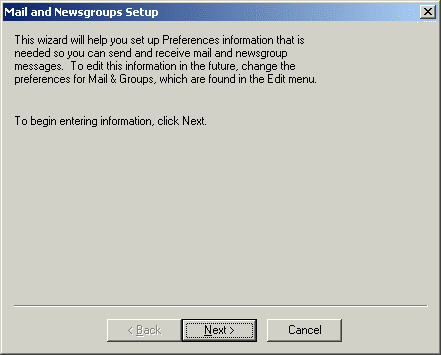
If you are starting Netscape Messenger for the first time, you may be greeted by the Mail & Newsgroups Setup Wizard. If you do not see the Setup Wizard proceed to step 5.
- Launch Netscape Messenger. When the Setup Wizard begins, click Next to advance to the next screen.
-
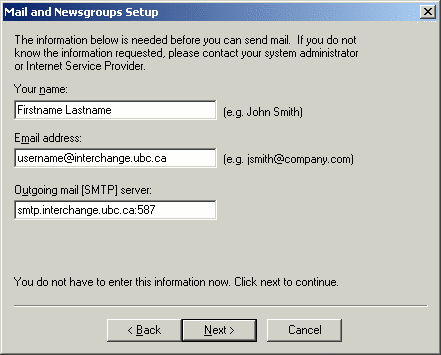
You will now be prompted for some basic information about your email account.
- Enter your full name in the Your Name box.
- Enter your email address in the Email address box.
- Your email address is username@interchange.ubc.ca where username is your Netinfo/Interchange username.
- Enter smtp.interchange.ubc.ca:587 in the Outgoing mail [SMTP] server box.
- Click Next to continue.
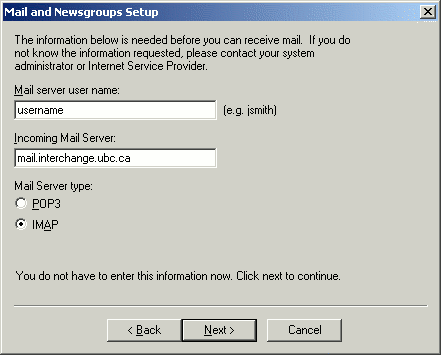
- You will now be prompted for your incoming mail server details.
- Enter your Netinfo/Interchange user name in the Mail server user name box.
- Your user name is the first part of your Netinfo/Interchange email address. If your email address is username@interchange.ubc.ca then your user name is username.
- Enter mail.interchange.ubc.ca in the Incoming Mail Server box.
- Select IMAP as the Mail Server type.
- Click Next to continue.
- Enter your Netinfo/Interchange user name in the Mail server user name box.
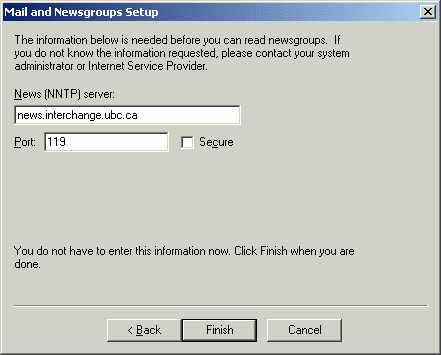
- You will now be prompted for your news server details.
- Enter news.interchange.ubc.ca in the News (NNTP) server box.
- Leave the Port set to 119 and the Secure box unchecked.
- Click Finish to complete the setup wizard.
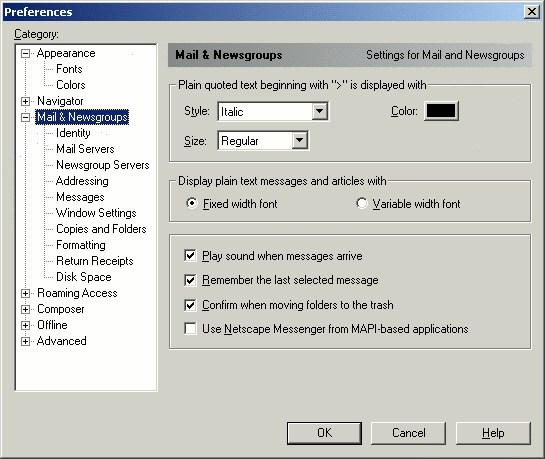
- In Netscape Messenger, pull down the Edit menu and select Preferences.
- A window will appear with a category tree running down the left-hand side. If there is a + sign next to Mail & Newsgroups, click it to expand that category.
-
Click the Identity category.
- Enter your full name in the Your Name box (if it is not already there.)
- Enter your email address in the Email Address box (if it is not already there.):
- Your email address is username@interchange.ubc.ca where username is your Netinfo/Interchange username.
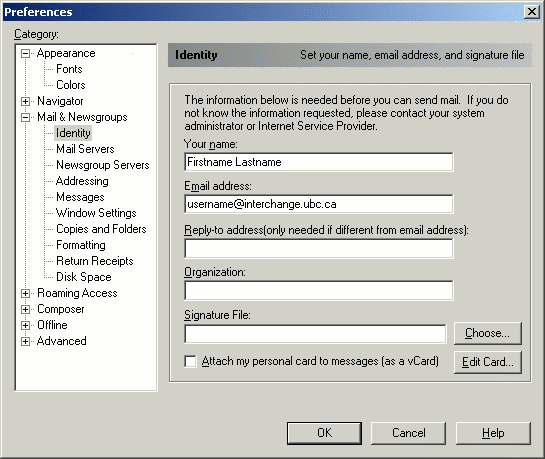
- Your email address is username@interchange.ubc.ca where username is your Netinfo/Interchange username.
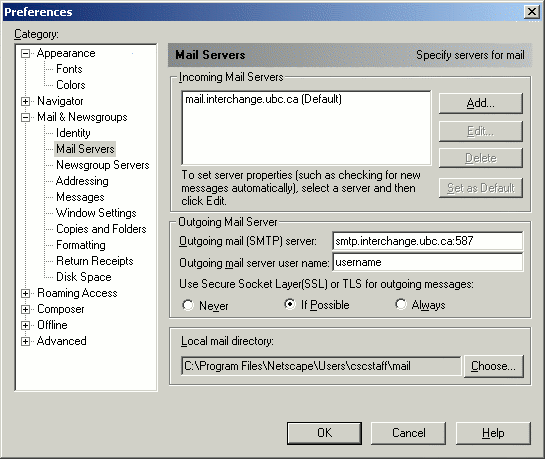
- Click the Mail Servers category.
- Under Incoming Mail Servers, click Edit if there is an existing mail server entry for Interchange. If there isn't one, click Add.
- Under Incoming Mail Servers, click Edit if there is an existing mail server entry for Interchange. If there isn't one, click Add.
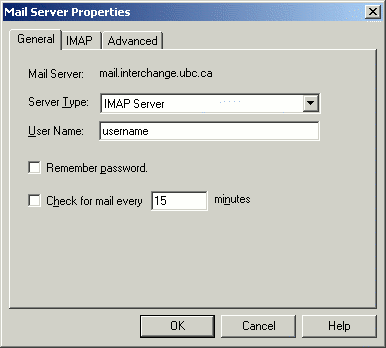
- Select the General tab.
- If it isn't already specified, enter mail.interchange.ubc.ca in the Mail Server field.
- In the Server Type field, click on the down arrow, and select IMAP Server. If you are adding a new mail server, it may already be selected.
- For User Name, enter in your username. If your email address is username@interchange.ubc.ca, your username is username.
- If you want Netscape Messenger to remember your password so that you don't have to enter it every time, click the box next to Remember password.
- Note: It is recommended that you leave this box unchecked if other people have access to your computer; otherwise they could read your mail.
- Note: It is recommended that you leave this box unchecked if other people have access to your computer; otherwise they could read your mail.
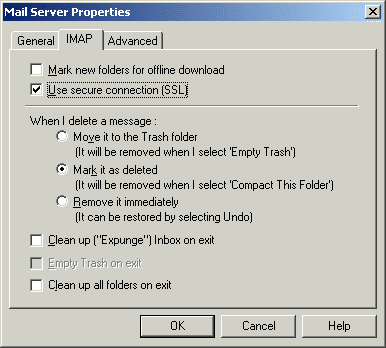
- Select the IMAP tab.
- Place a check beside Use Secure Connection (SSL)
- Click OK to save changes.
- For Outgoing mail (SMTP) server, enter smtp.interchange.ubc.ca:587
- Click on the entry called Mail Servers.
- Set the Use Secure Sockets Layer (SSL) or TLS for outgoing messages to: Always
- Fill out the Outgoing mail server user name field with your Netinfo/Interchange username.
- Click OK to save your changes.
