This document explains how to set up Outlook XP (2002) for Netinfo/Interchange using Secure IMAP (IMAP). Before proceeding, please visit the Office Update website and ensure that you have updated your copy of Outlook XP with the latest Microsoft patches.
- In Outlook XP, pull down the Tools menu and select Email Accounts...
- Select Add a new e-mail account, then click Next.
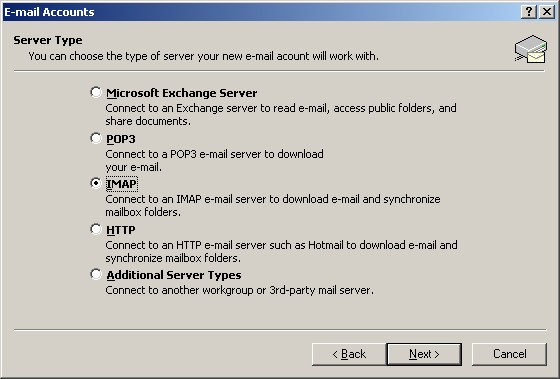
- A window will appear, listing account types to add. Select IMAP and click on Next to continue.
- Fill out the Internet E-mail Settings (IMAP) form as follows:
- Type your full name in the Your Name field.
- Type your Interchange email address in the E-mail Address field.
- In the Incoming mail server (IMAP) field, enter mail.interchange.ubc.ca
- In the Outgoing mail server (SMTP) field, enter smtp.interchange.ubc.ca
- The User Name field should already be filled out for you but ensure that it contains your Netinfo/Interchange username.
- Your username is the first part of your email address. If your email address is username@interchange.ubc.ca, then your username is username.
- Enter your Netinfo/Interchange password in the Password field.
- Ensure that the Log on using Secure Password Authentication (SPA) box is not checked.
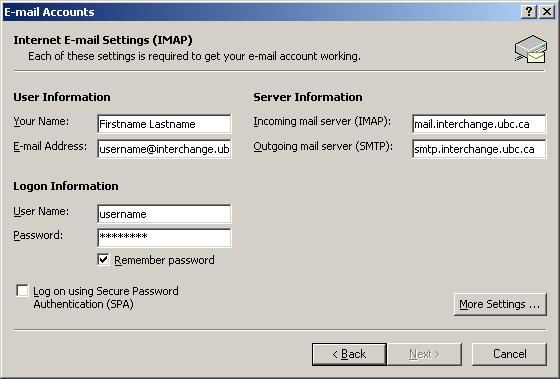
- Click the More Settings ... button.
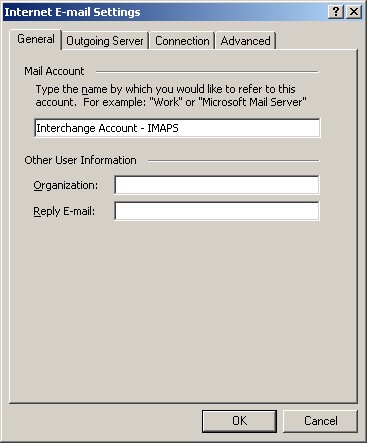
- The Mail Account is the mail profile name. For the Mail Account, type in whatever you would like to refer to it as. ie. Interchange Account - IMAPS.
- The Mail Account is the mail profile name. For the Mail Account, type in whatever you would like to refer to it as. ie. Interchange Account - IMAPS.
- Click the Outgoing Server tab.
- Place a checkmark next to My outgoing server (SMTP) requires authentication.
- Make sure that Use same settings as my incoming mail server is selected.
- Click the Advanced tab.
- Under Incoming server (IMAP), place a checkmark next to This server requires an SSL-secured connection (SSL).
- The number in the box next to Incoming mail (IMAP) server should automatically change to 993. If it doesn't, change the number in this box to 993.
- Under Outgoing server (SMTP), place a checkmark next to This server requires an SSL-secured connection (SSL).
- Change the number next to Outgoing mail (SMTP) to 465.
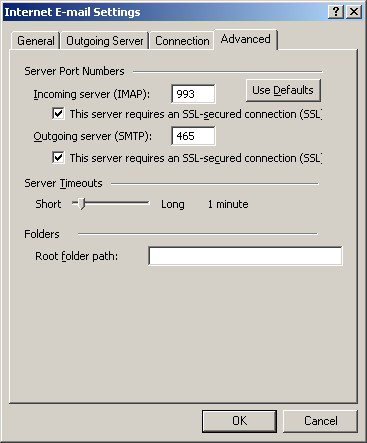
- Click OK to return to the main settings window.
- Click Next.
- Click Finish.
- Restart Outlook for your changes to take effect.
