This document explains how to set up Outlook 2007 on a PC for use with Netinfo/Interchange using Secure IMAP.
Please Note: The UBC IT Help Desk can only provide limited support for this application until further notice.
- First start Outlook 2007: Go to Start > Programs > Microsoft Office > Microsoft Office Outlook 2007 .
- If you have not used Outlook before, and the Outlook 2007 Startup Wizard appears, click Next twice.
- If the Startup Wizard does not appear, click Tools > Account Settings… > New… > then click Next when asked if you want to create an e-mail account.
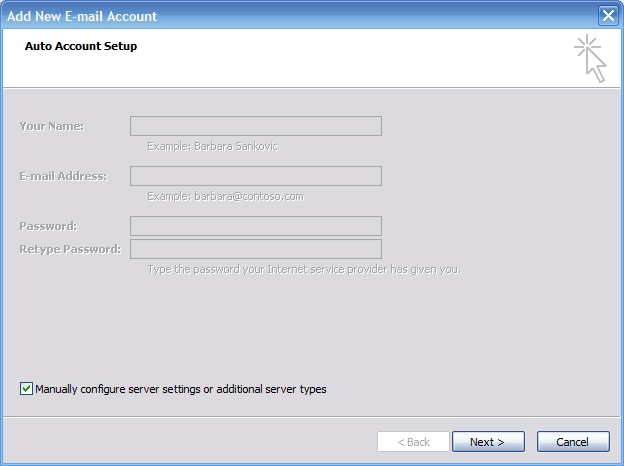
- On the Auto Account Setup screen, select Manually configure server settings or additional server types , and then click Next .
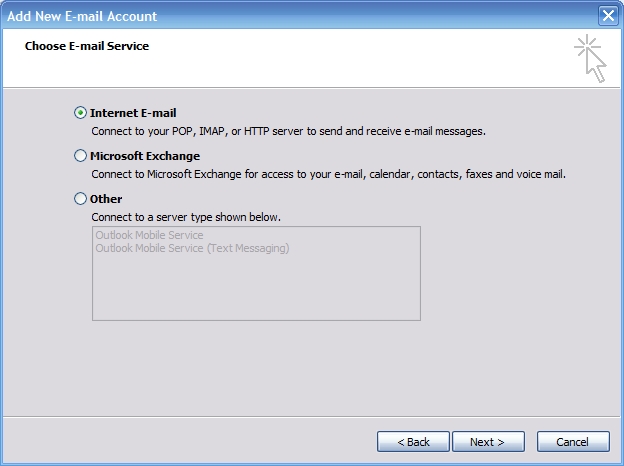
- On the Choose E-Mail Service screen, select Internet E-mail , and then click Next .
- Fill out the Internet E-Mail Settings form as follows:
- Type your full name in the Your Name field.
- Type your Interchange email address in the E-Mail Address field.
- In the Account Type field, ensure that IMAP is selected.
- In the Incoming mail server field, enter mail.interchange.ubc.ca
- In the Outgoing mail server (SMTP) field, enter smtp.interchange.ubc.ca
- The User Name field should already be filled out for you, but ensure that it contains your Netinfo/Interchange username.
- The Interchange username is the first part of your email address. If your e-mail address is username@interchange.ubc.ca , then your username is username .
- Enter your Netinfo/Interchange password in the Password field.
- Ensure that the Require logon using Secure Password Authentication (SPA) box is not checked.
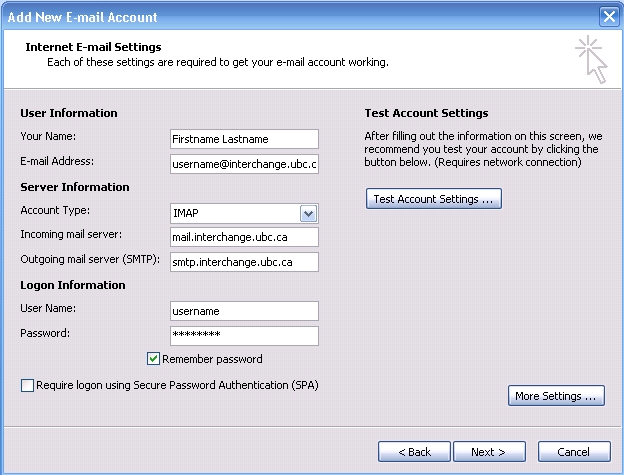
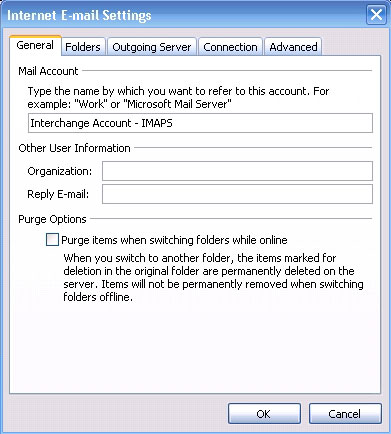
- Click the More Settings… button:
- The Mail Account is the mail profile name. For the Account Name , type in whatever you would like to name the account. (ie: Interchange Account - IMAPS )
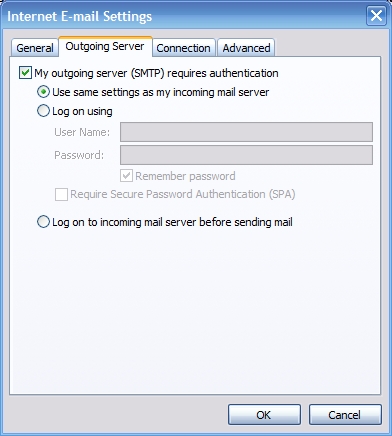
- Click the Outgoing Server tab:
- Check the box next to My outgoing server (SMTP) requires authentication .
- Ensure that Use same settings as my incoming mail server is selected.
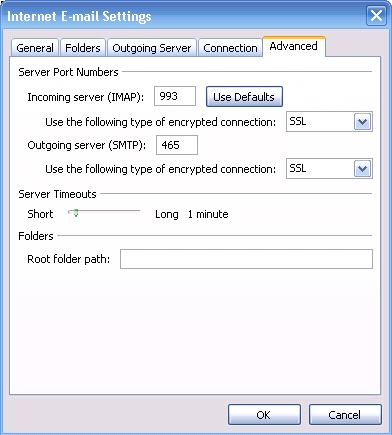
- Click the Advanced tab:
- Under Incoming server (IMAP) , set Use the following type of encrypted connection to SSL .. Also, ensure that the port number is set to 993 .
- Under Outgoing server (SMTP) , set Use the following type of encrypted connection to SSL . Change the port number to 465 .
- Click OK to return to the main Internet E-Mail Settings window.
- Click Next .
- Click Finish to complete the setup.
- You should now be able to access your Netinfo/Interchange email using Secure IMAP.
