This document explains how to set up Pine on a PC for Netinfo/Interchange using Secure IMAP (IMAPS).
- If you haven't already, you can download the latest version of Pine for the PC from this web page: http://www.washington.edu/pine/getpine/pcpine.html
- Click on the "Download PC-Pine setup program" link to download the installation file.
- Once it has finished downloading, run the installation program.
- The installation steps are as follows:
- An alert window will appear saying "This will install PC-Pine. Do you wish to continue?". Click Yes.
- Click Next.
- Read and if you accept the agreement, select the I accept the agreement option and click Next.
- Select the Destination folder. You can leave it as is or change it if you want to install the program elsewhere. Click Next.
- It will then ask you for a Start Menu Folder name. You can leave it as is or change it if you wish. Click Next.
- Next it will ask you if you want to create a desktop icon and/or a quick launch icon. Select whichever you would like. If you select neither, you will still be able to access it from the Start menu. Click Next.
- Click Install.
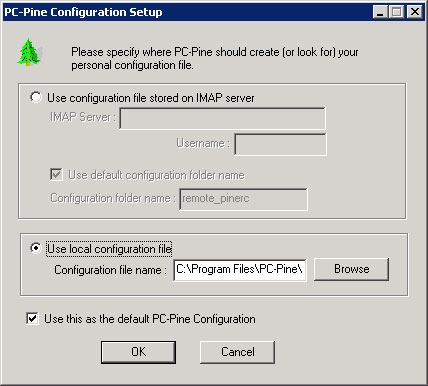
- You will now be prompted for configuration options. Select the second option, Use local configuration file, and click OK.
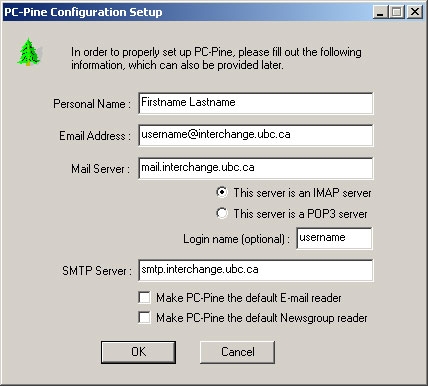
- On the next window, please complete all fields as follows:
- For Personal Name, enter in the name you wish displayed when you send an email message. This is typically your full name.
- In the Email Address field, type in your Netinfo/Interchange email address.
- This is usually username@interchange.ubc.ca where username is your Netinfo/Interchange username.
- For Mail Server, type: mail.interchange.ubc.ca
- Select the This is an IMAP server radio button.
- In the Login name (optional) field, type in your Netinfo/Interchange username.
- In the SMTP Server field, type: smtp.interchange.ubc.ca
- Click OK.
- At the end of the PC-Pine installation, check the Launch PC-Pine checkbox, uncheck the View PC-Pine README checkbox and click Finish.
- If this is the first time you're running PC-Pine, you will be greeted with a welcome screen. Press E to exit the welcome screen.
- You may notice that Pine will complain about a security problem. This is because we still need to configure SSL to ensure a secure connection to the mail server.
- After the warning, you will be prompted for your password. Click <CTRL> + C to cancel.
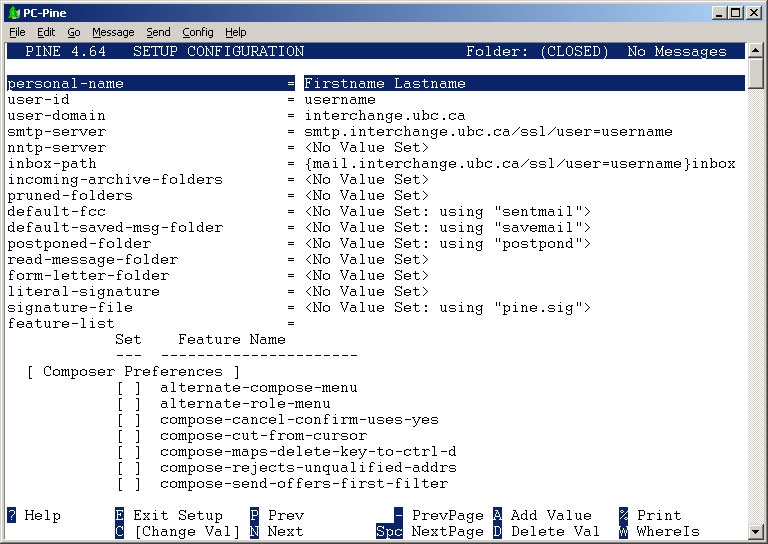
- This should take you to the main menu. Press S to enter Setup, and then press C to enter the Config screen.
- Use the arrow keys on your keyboard to move to the smtp-server field and press C to edit it. Change it to the following:
- smtp.interchange.ubc.ca/ssl/user=username
- ...where username is your Netinfo/Interchange username.
- smtp.interchange.ubc.ca/ssl/user=username
- Press <Enter> to make the change.
- Use the arrow keys again to move to the inbox-path field and press C to edit it. You will be prompted to change the name of the inbox server. Change it to the following:
- mail.interchange.ubc.ca/ssl/user=username
- ...where username is your Netinfo/Interchange username.
- mail.interchange.ubc.ca/ssl/user=username
- Press <Enter> to make the change.
- You will then be prompted to choose a folder to use as the inbox. Leave this blank and press <Enter> to confirm. Your "inbox-path" field should now look like:
- {mail.interchange.ubc.ca/ssl/user=username}inbox
- ...where username is your Netinfo/Interchange username.
- {mail.interchange.ubc.ca/ssl/user=username}inbox
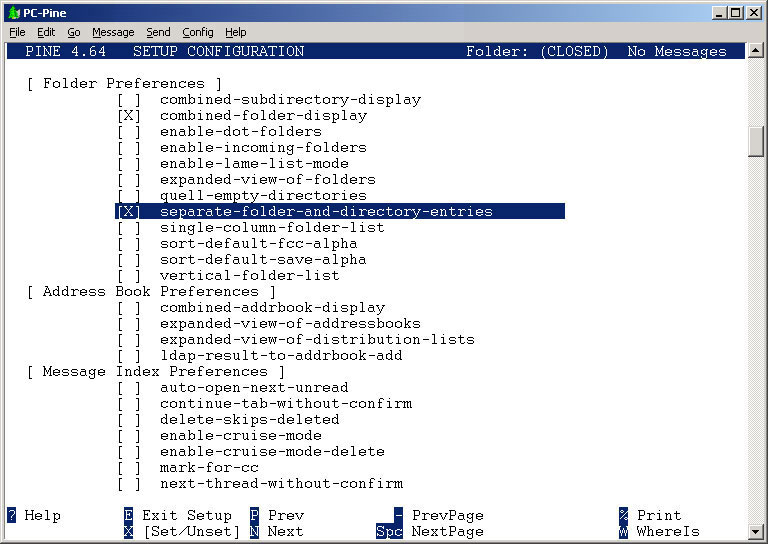
- Scroll down to the Folder Preferences section using the down arrow on your keyboard.
- Highlight the "combined-folder-display" option and press <ENTER>. There should now be an X next to this option.
- Highlight the "separate-folder-and-directory-entries" option and press <ENTER>. There should now be an X next to this option.
- Press E to exit the setup screen, and press Y to confirm that you wish to save your settings.
- This should take you to the main menu. Press S to enter Setup again, but this time press L to enter the CollectionLists screen.
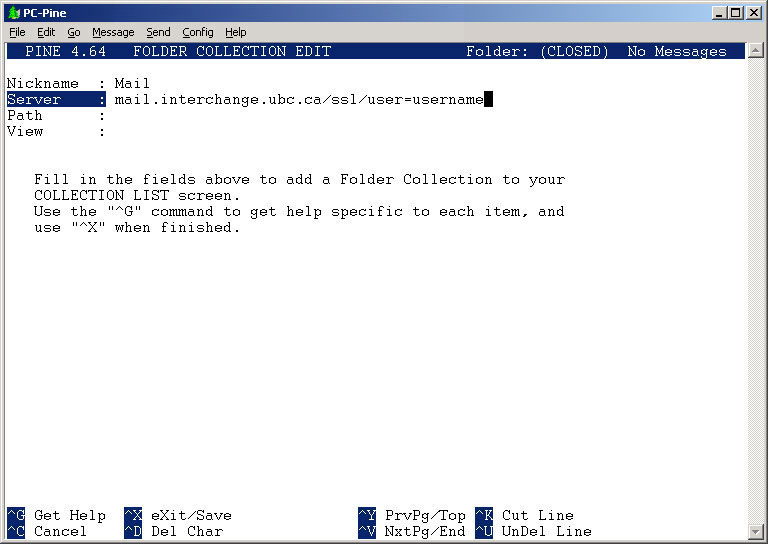
- Press C to update the Folder Collection entry.
- In the Nickname field, type: Mail
- For Server, type: mail.interchange.ubc.ca/ssl/user=username
-
- ...where username is your Netinfo/Interchange username
- Ensure that the Path and View fields are blank.
- Press <CTRL> + X and then Y to exit and save changes.
- Press E to exit and return to the Main Menu.
- Press Q to quit PC-Pine, and then Y to confirm that you wish to quit.
- Open up PC-Pine again from your Start menu or Desktop (if you have an icon there.)
- When PC-Pine starts up, you will be prompted for your password, this time without the security warning. Type in your Netinfo/Interchange password.
- Press I to view messages in your INBOX.
- You can now browse your mail and compose messages using Secure IMAP and Secure SMTP.
