This document explains how to set up Pine on Mac OS X 10.4 for Netinfo/Interchange using Secure IMAP (IMAPS).
Please Note: These instructions will only work with Mac OS X 10.4 and you need to have admin access to your computer to install Pine. The UBC IT Help Desk is only able to offer "best effort" support with this application.
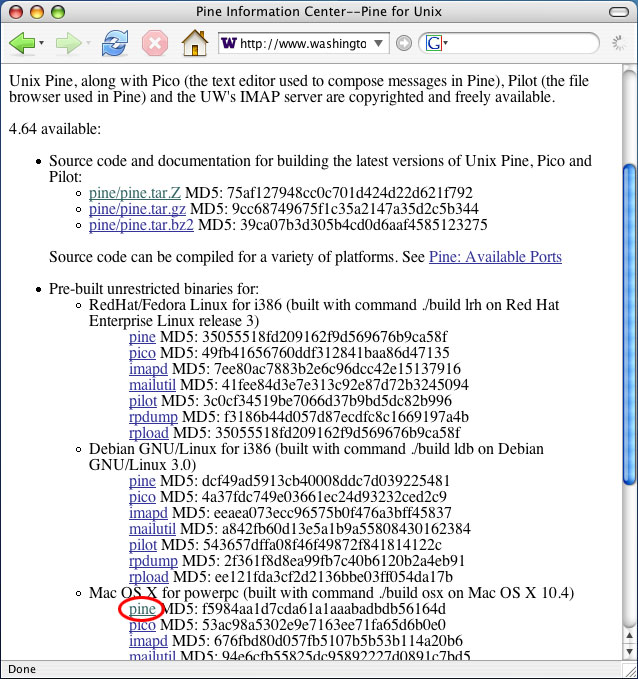
- To download Pine for the Mac, visit http://www.washington.edu/pine/getpine/unix.html and scroll down to the section titled "Mac OS X for powerpc (built with command ./build osx on Mac OS 10.4)".
- Click on the Pine link in this section to download it. See the image below for reference.
-
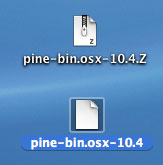
- After downloading the file, you should have an icon on your Desktop called pine-bin.osx-10.4.Z.
- Double-click on this icon to expand the archive (if this isn't automatically done.) This will place a second file on your Desktop called pine-bin.osx-10.4.
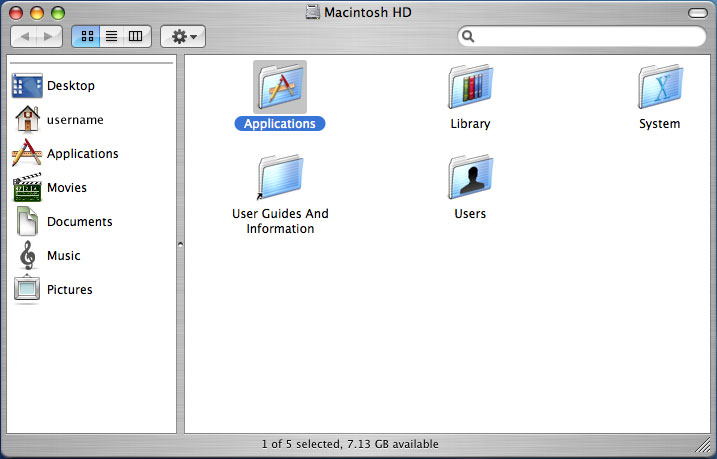
- You now have to run the Mac OS X Terminal application. To do this, double-click on your Hard Drive icon.

- This will open up a window. Double-click on the Applications folder.
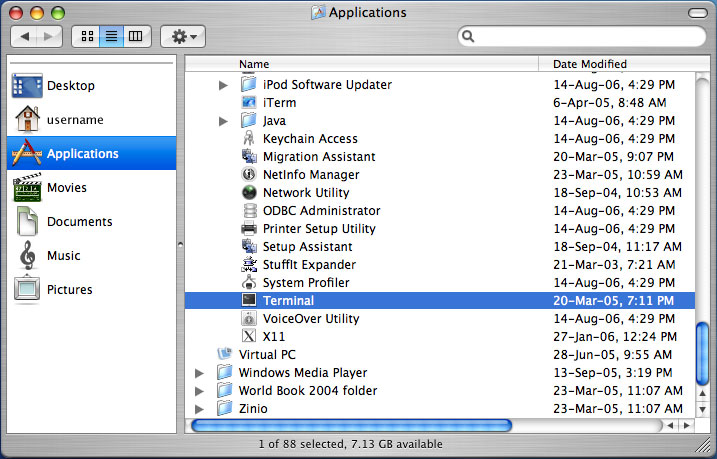
- Scroll down to the bottom of the list to find the application named Terminal.
- Double-click the Terminal filename to open it up.
-
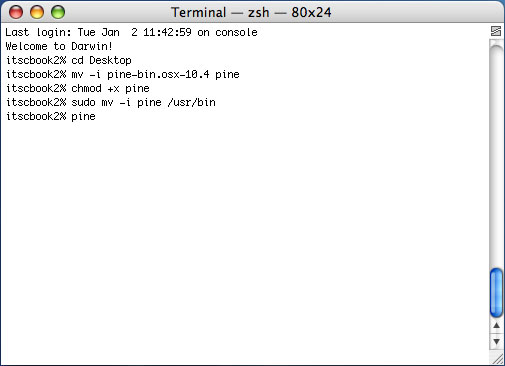
- A black terminal window will appear with a command prompt. Follow these instructions to get Pine running on your computer:
- Type: cd Desktop
- Press <Enter>
- This changes the directory so that it can see the files on your Desktop. This is where the downloaded Pine application is located.
- Type: mv -i pine-bin.osx-10.4 pine
- Press <Enter>
- This will rename the "pine-bin.osx-10.4" filename to "pine". This makes it easier to type when you want to access Pine in the future.
- Type: chmod +x pine
- Press <Enter>
- This makes the file executable. You need to do this to get Pine working.
- Type: sudo mv -i pine /usr/bin
- Press <Enter>
- You may be prompted to enter in your computer's admin password.
- This command moves the Pine application to a system folder. This allows you to run Pine from any directory.
- Type: pine
-
- Press <Enter>
- This will start the Pine email application.
-
- Type: cd Desktop
- Since this is your first time running Pine, you will be greeted with a welcome screen. Press E to exit the welcome screen.
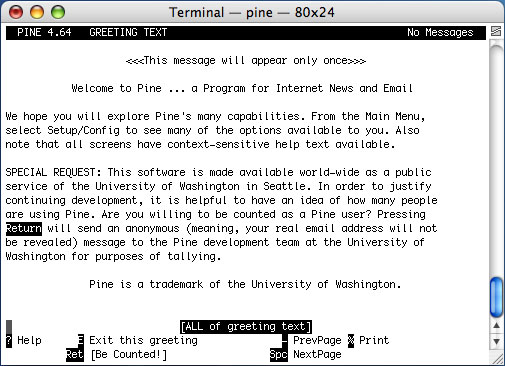
- This should take you to the main menu. Press S to enter Setup, and then press C to enter the Config screen.
- Make the following changes on the setup screen:
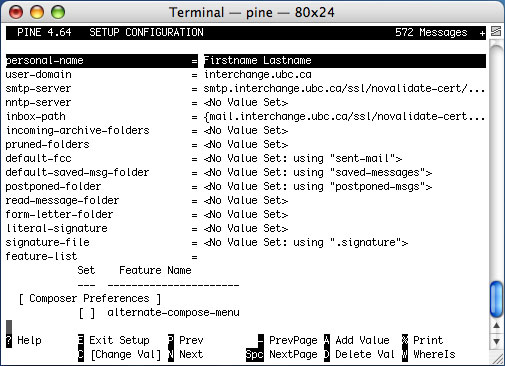
- Use the arrow keys on your keyboard to move to the personal-name field and press C to edit it.
- Type in your first and last name. This is what recipients will see as your Email Name.
- Use the arrow keys to move down to the user-domain field and press C to edit it.
- Type in: interchange.ubc.ca
- Use the arrow keys to move to the smtp-server field and press C to edit it. Change it to the following:
- smtp.interchange.ubc.ca/ssl/novalidate-cert/user=username
- ...where username is your Netinfo/Interchange username.
- Press <Enter> to make the change.
- smtp.interchange.ubc.ca/ssl/novalidate-cert/user=username
- Use the arrow keys again to move to the inbox-path field and press C to edit it. You will be prompted to change the name of the inbox server. Change it to the following:
-
- mail.interchange.ubc.ca/ssl/novalidate-cert/user=username
- ...where username is your Netinfo/Interchange username.
- Press <Enter> to make the change.
- You will now be prompted to choose a folder to use as the inbox. Leave this blank and press <Enter> to confirm.
-
- mail.interchange.ubc.ca/ssl/novalidate-cert/user=username
- Use the arrow keys on your keyboard to move to the personal-name field and press C to edit it.
- Scroll down to the Folder Preferences section using the down arrow on your keyboard.
- Highlight the "combined-folder-display" option and press <ENTER>. There should now be an X next to this option.
- Highlight the "separate-folder-and-directory-entries" option and press <ENTER>. There should now be an X next to this option.
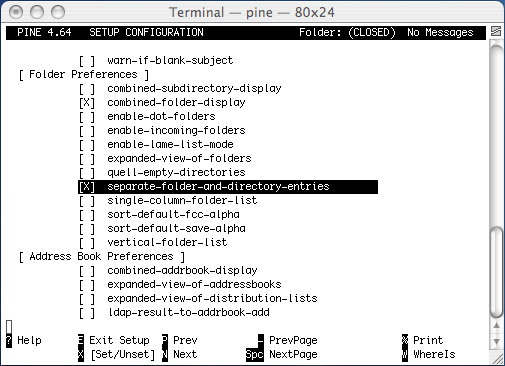
- Press E to exit the setup screen, and press Y to confirm that you wish to save your settings.
- This should take you to the main menu. Press S to enter Setup again, but this time press L to enter the CollectionLists screen.
- Press C to update the Folder Collection entry.
- In the Nickname field, type: Mail
- For Server, type: mail.interchange.ubc.ca/ssl/user=username
- ...where username is your Netinfo/Interchange username
- Ensure that the Path and View fields are blank.
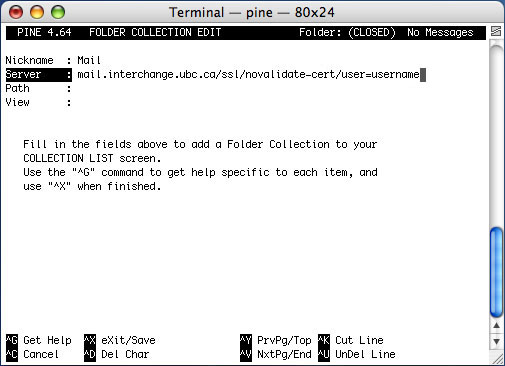
- Press E to exit the setup, and press Y to confirm that you wish to save your settings.
- Press Q to quit Pine, and then Y to confirm that you wish to quit.
- Type in pine again in the terminal window and press <Enter>.
- When Pine starts up, you will be prompted for your password. Type in your Netinfo/Interchange password.
- Press I to view messages in your INBOX.
- You can now browse your mail and compose messages using Secure IMAP and Secure SMTP.
