This document explains how to set up Mozilla 1.7 for Netinfo/Interchange using Secure POP (POPS).
Configuring Email Settings
- Open Mozilla and select Mail & Newsgroups from the Window menu.
- If an Account Wizard window pops up titled "New Account Setup", you can skip the next two steps and proceed to step 5.
- Go to the Edit menu and select Mail & Newsgroups Account Settings...
- Click on the Add Account button.
- Select Email Account and click the Next button.
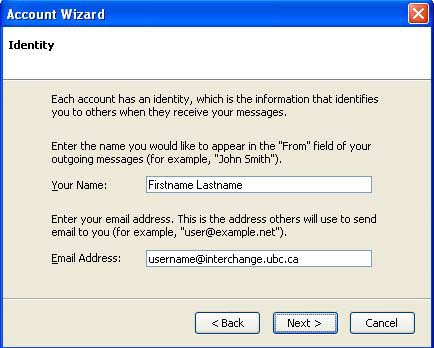
- In the Identity Window:
- Enter your full name in the Your Name box.
- Enter in your Email address in the Email Address box.
- Your Email address is username@interchange.ubc.ca where username is your Netinfo/Interchange username.
- Click the Next button.
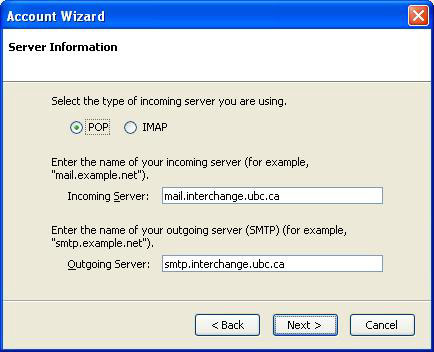
- In the Server Information window:
- Select POP for the type of incoming server.
- Type in mail.interchange.ubc.ca for the Incoming Server and smtp.interchange.ubc.ca for the Outgoing Server.
- Click on the Next button.
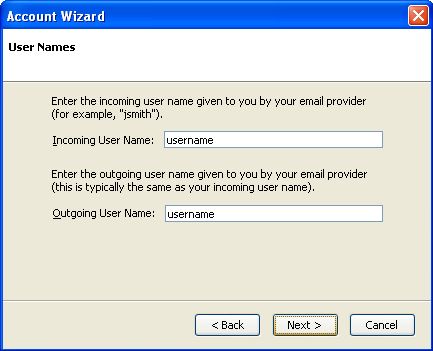
- In the User Names window:
- Your Netinfo/Interchange username should automatically be entered in the Incoming User Name and the Outgoing User Name fields. If this is not the case, enter in your Netinfo/Interchange username in both of these fields.
- Your User Name is the first part of your Netinfo/Interchange email address. If your email address is username@interchange.ubc.ca, then your User Name is username.
- Click the Next button.
- Your Netinfo/Interchange username should automatically be entered in the Incoming User Name and the Outgoing User Name fields. If this is not the case, enter in your Netinfo/Interchange username in both of these fields.
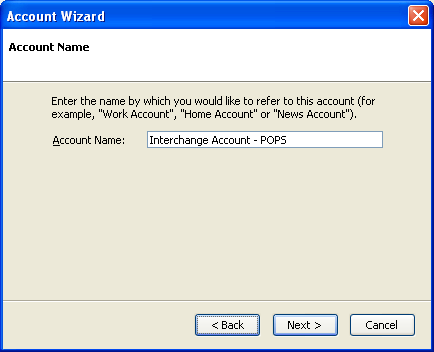
- In the Account Name window:
- The Account Name is a Profile name. For the Account Name, type in whatever you would like to refer to it as, for example Interchange Account - POPS.
- Click the Next button.
- Verify your settings and click Finish.
- If the option to Download messages now appears, uncheck the box first then click Finish.
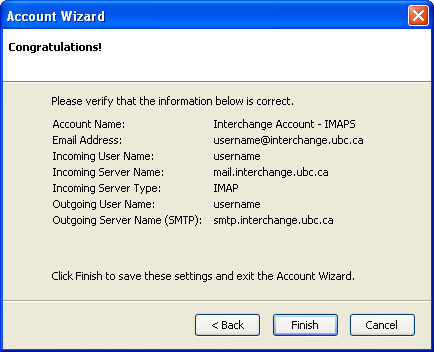
- If the option to Download messages now appears, uncheck the box first then click Finish.
Enabling SSL (Secure Socket Layer) for Incoming and Outgoing Mail
- You should now be back in the Mail & News Account Settings menu.
- If you are not, open the Edit menu and select Mail & Newsgroups Account Settings.
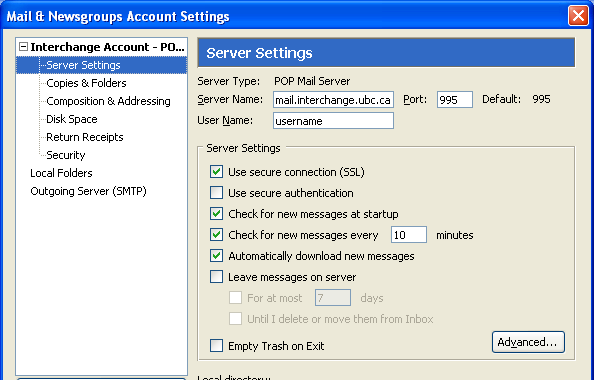
- Select Server Settings.
-
Check the box next to Use secure connection (SSL). Once this is checked, the port number should automatically change to 995.
-
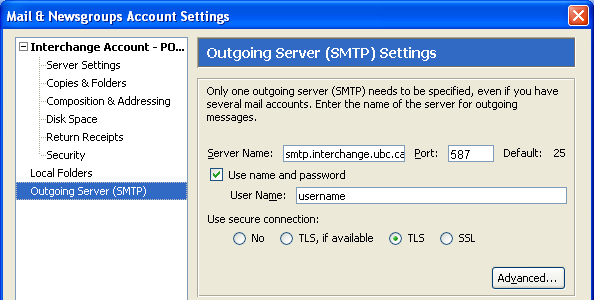
- Select Outgoing Server (SMTP).
- The Server Name field should already be filled in. If it is empty, type in smtp.interchange.ubc.ca
- Ensure that the box entitled Use name and password is checked and that your Netinfo/Interchange username is in the User Name field.
- Under Use Secure Connection, select TLS.
- In the Port field, type in 587.
- Click OK to close to Mail & Newsgroups Account Settings.
