We have tested the Linux PPTP Client available from the PPTP Client Home Page for connecting to the UBC VPN service. Download and configuration instructions for the Linux PPTP Client are listed below.
Note: UBC IT does not provide support for Linux setup/installation including VPN. This document is provided as general reference only and is not confirmed to be working in all Linux distributions.
Download and Install the Linux PPTP Client
- The Linux PPTP client can be found at the PPTP Client Home Page
- Step-by-step instructions for setting up the Linux PPTP Client for several popular Linux distributions are available at this website.
- In general, the steps are:
- Install MPPE support in your kernel.
- Install MPPE support in PPP.
- Install and configure the PPTP client.
- Start the tunnel.
- Configure routing.
- The Linux PPTP client configuration instructions for the UBC VPN are outlined below. Routing information is also at the end of this page.
Setting Up the PPTP Client
- Execute pptpconfig.
- Select the Server Tab.
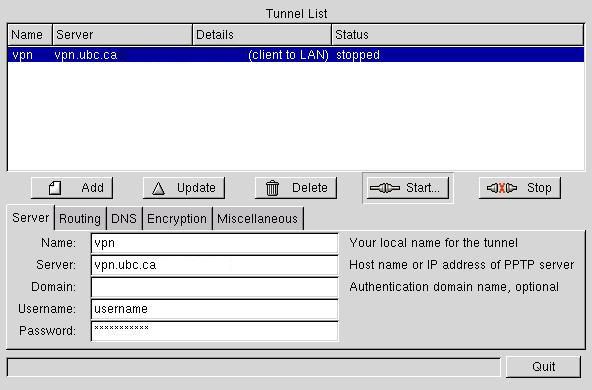
- Enter a name for your tunnel in the Name dialog box (e.g. VPN or UBC VPN).
- In the Server dialog box, enter the address of the UBC VPN server:
- If you are associated with the UBC-Vancouver campus, type: vpn.ubc.ca
- If you are associated with the UBC-Okanagan campus, type: vpn.ok.ubc.ca
- Enter your CWL Username in the Username dialog box.
- Click Add to add the tunnel to the Tunnel List.
- Select the Routing tab.
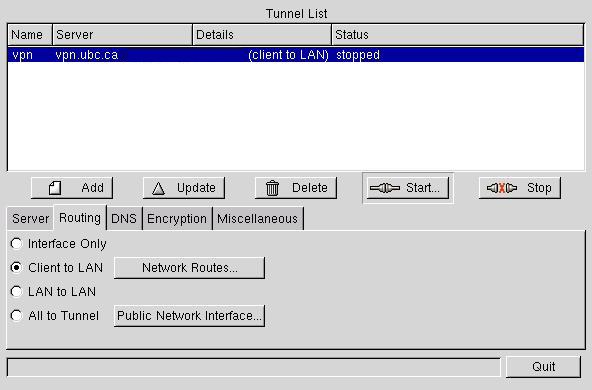
- Select the Client to LAN radio button.
- Click Update to update your tunnel configuration.
- Select the DNS tab.
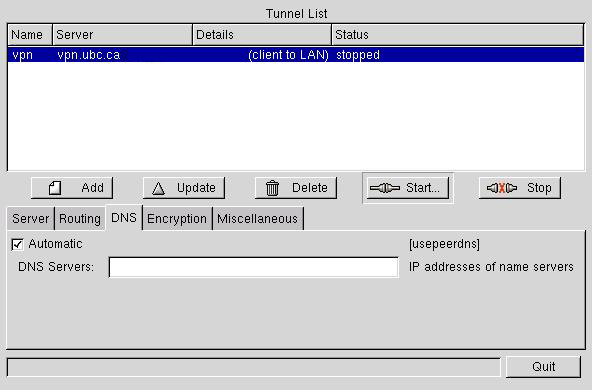
- Make sure Automatic is checked.
- Click Update to update your tunnel configuration.
- Select Encryption Tab.
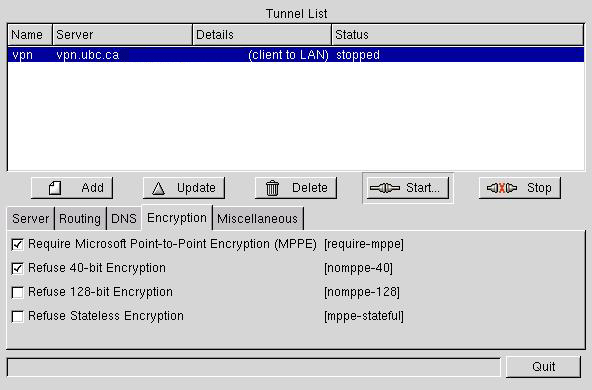
- Make sure you have installed MPPE support as described at http://pptpclient.sourceforge.net/.
- Check require-mppe.
- Check nomppe-40 to disable support for 40-bit Encryption keys.
- Click Update to update your tunnel configuration.
- Click on Miscellaneous Tab.
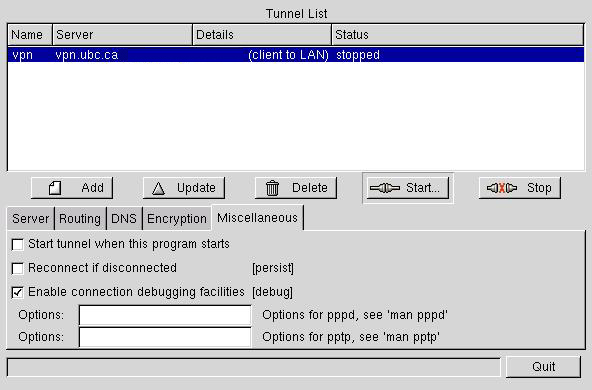
- In order to facilitate debugging check the debug option.
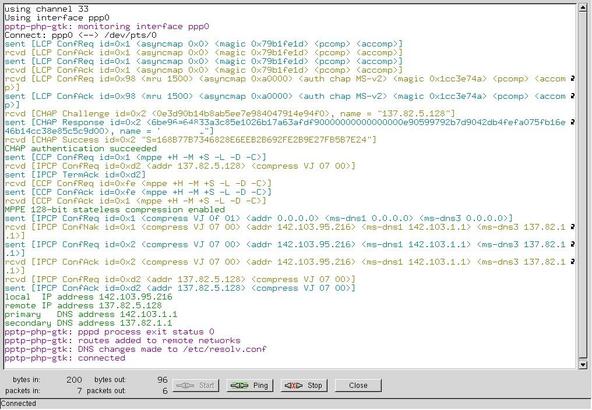
Select your tunnel in the Tunnel List and click Start. A debug output window should pop-up. To help with troubleshooting, a screenshot of a debug window for a working client is given below (click to enlarge). In case of further problems consult http://pptpclient.sourceforge.net/howto-diagnosis.phtml.
- Under Properties, click on the Security tab.
Other Settings
- Make sure you add the following alias to your /etc/modules.conf file to be able to load the ppp-compress-18 module : 'alias ppp-compress-18 ppp_mppe'
- You will need to set up routings for UBC networks including:
-
- 142.103.*.*
- 137.82.*.*
- 128.189.*.*
- Routing can be configured as described below:
e.g. To connect to all devices on the 142.103.0.0 net over the VPN, configure routing as follows:
- route add -net 142.103.0.0 netmask 255.255.0.0 dev ppp0
e.g. To connect to an individual device 142.103.10.10 over the VPN, configure routing as follows:
- Determine the end point of your VPN tunnel using "ifconfig ppp0" command. The address of the end-point/gateway will be listed as "P-t-P: 142.103.x.x" where 142.103.x.x is the IP address of the end-point/gateway.
- Setup a route to the device 142.103.10.10 through the gateway 142.103.x.x.
- route add 142.103.10.10 gw 142.103.x.x
You are now ready to connect to UBC VPN.
*If you are having problems connecting, you may wish to check your firewall/iptables settings.
