This document assumes that you have an Internet connection already present. Please follow the instructions below to configure Windows Me to connect to UBC's VPN service.
- Install Virtual Private Networking Component
- Configure the VPN Client
- Configure the VPN Client Properties
- Connecting
- Disconnecting
Install Virtual Private Networking Component
The first thing you have to do is to install the Windows Virtual Private Networking component. To install the VPN component:
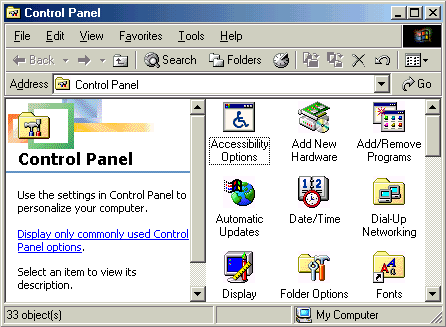
- Select Start -> Settings -> Control Panel.
- Double-click on Add/Remove Programs.
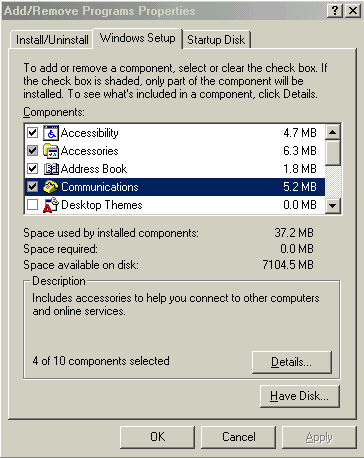
- In the Add/Remove Programs Properties dialog box:
- Select the Windows Setup tab.
- Highlight Communications (as shown below).
- Click the Details button.
- In the Communications dialog box, scroll down and make sure that Virtual Private Networking has a checkmark beside it.
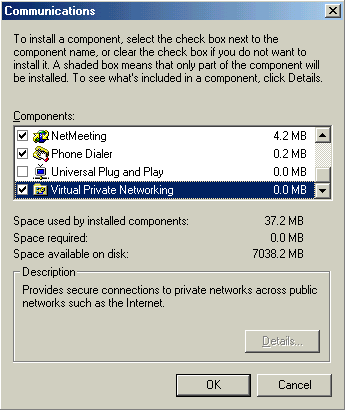
- Click OK to continue.
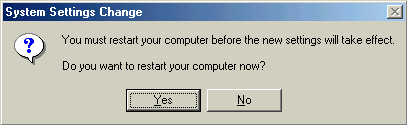
- You will be returned to the Add/Remove Programs Properties window. Click OK and the files will be installed.
- You will be prompted to restart your computer. Click Yes to restart.
Configure the VPN Client
- Select Start > Settings > Dial-Up Networking.
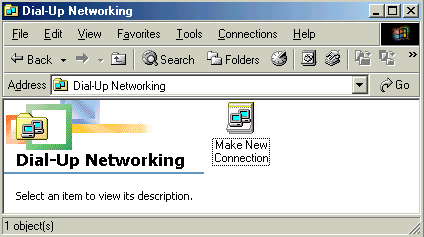
- Double Click Make New Connection to create your UBC VPN connection.
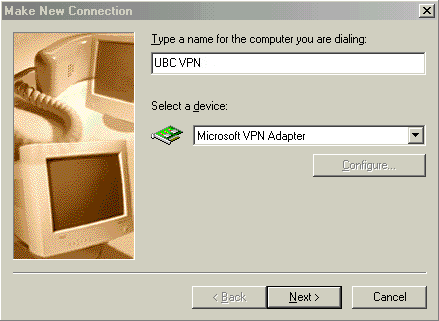
- Under Type a name for the computer you are dialing, enter: UBC VPN
- In the Select a device pull-down menu, choose Microsoft VPN Adapter.
- Click Next to continue.
- Under Host name or IP Address:
- If you are associated with the UBC-Vancouver campus, type: vpn.ubc.ca
- If you are associated with the UBC-Okanagan campus, type: vpn.ok.ubc.ca
- Click Next to continue.
- Click Finish.

Configure the VPN Client Properties
- Select Start > Settings > Dial-Up Networking.
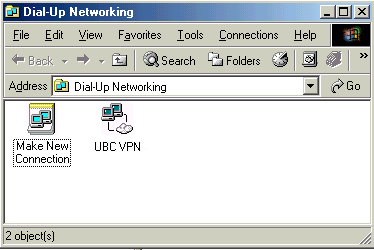
- Right click on the UBC VPN icon and select Properties from the menu.
- Select the Networking tab.
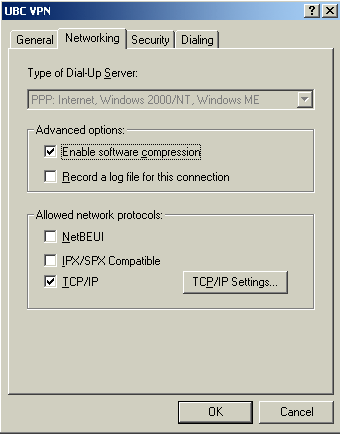
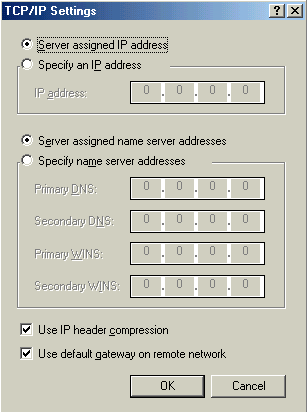
- Click on TCP/IP Settings.
- Ensure the Server assigned IP address radio button is enabled.
- Ensure the Server assigned name server addresses radio button is enabled.
- Ensure that Use IP header compression is checked.
- Ensure that Use default gateway on remote network is checked.
- Click OK.
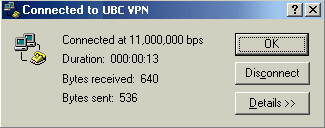
Connecting
- Select Start > Settings > Dial-Up Networking.
- Double click on the UBC VPN icon.
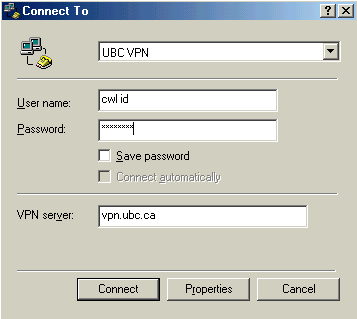
- Enter your CWL ID in the User name field.
- Enter your CWL Password in the Password field.
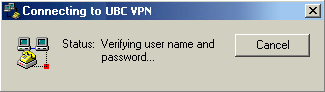
- Click Connect.
-
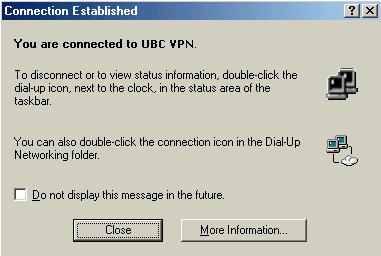
If you are connected, the Connection Established screen will appear. Click Close.
Disconnecting
- Select Start > Settings > Dial-Up Networking.
- Double click on the UBC VPN icon.
- Click Disconnect to end your UBC VPN connection.
