This document assumes that you have an Internet connection already present.
Please follow the instructions below to configure Windows Vista to connect to UBC's VPN service.
Creating a New VPN Connection:
- Go to Start -> Connect To

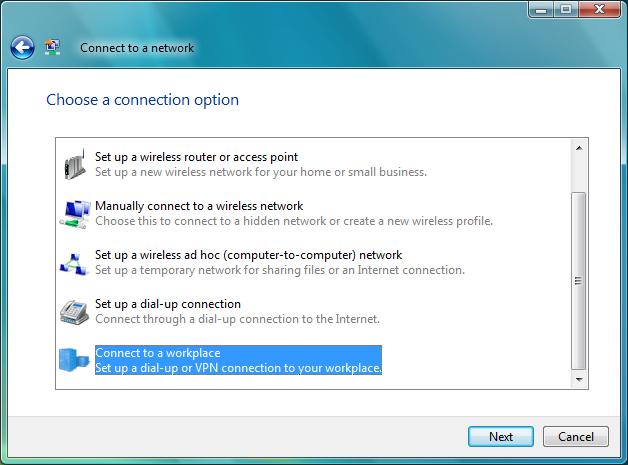
- Click the Set up a new connection or network Option.
- Scroll down to the bottom of the list and select Connect to a workplace, then click Next.
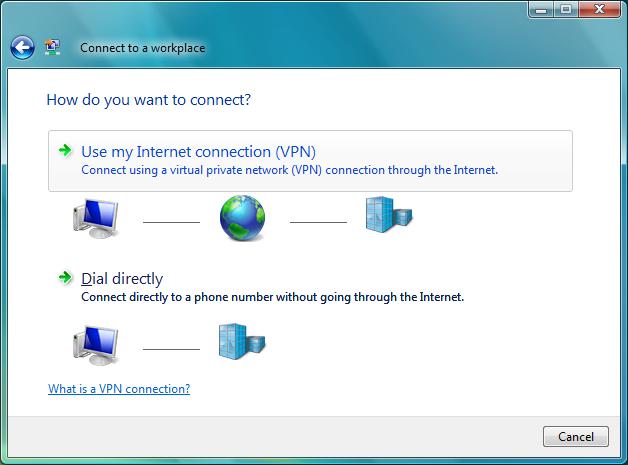
- Select the Use my Internet Connection option.
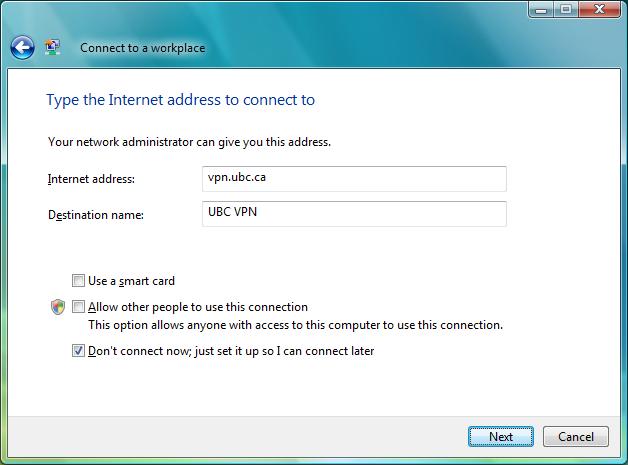
- For Internet Address, use the following information:
- For UBC-Vancouver users, enter vpn.ubc.ca
- For UBC-Okanagan users, enter vpn.ok.ubc.ca
- Enter UBC VPN as the Destination Name, and click Next.
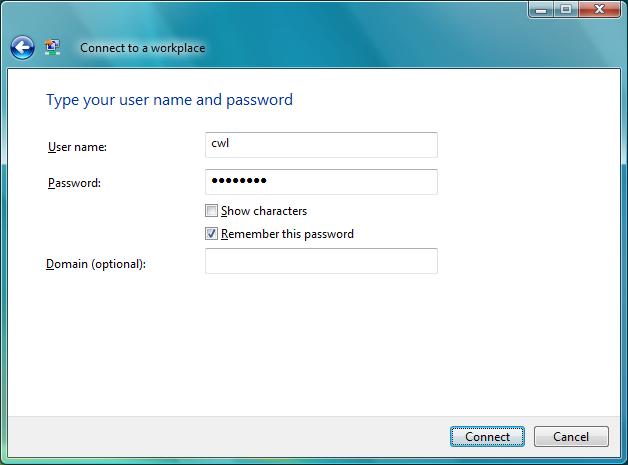
- Enter your CWL name and password for the User Name and Password. You can select the Remember this Password option if you'd like to have the password remembered. Leave the Domain Name field blank, and click Next.
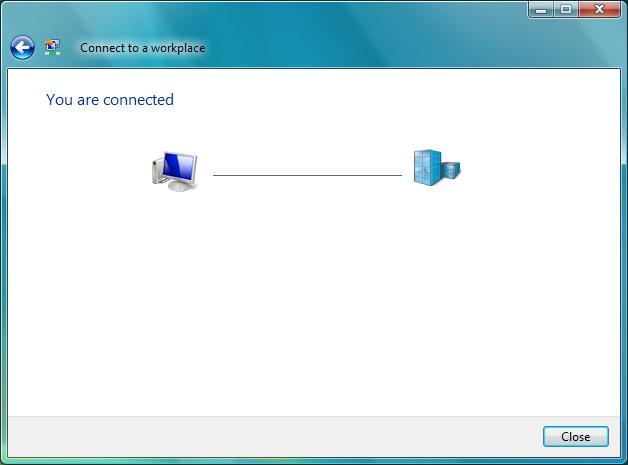
- Congratulations! You're set up to use VPN. If you'd like to connect to the connection later, you can use the Connect To option in the Start menu.