This document explains how to set up a new e-mail profile for Outlook 2013 using Auto-Discovery.
- Click on the Start button and then click on Control Panel .
- On certain computers, the Control Panel link is located within the Settings menu.
- Locate the Mail icon in the Control Panel window.
- If you do not see this icon, click on the Classic View or the Switch to Classic View link, located on the left-hand side of the Control Panel window, and look for the icon again.
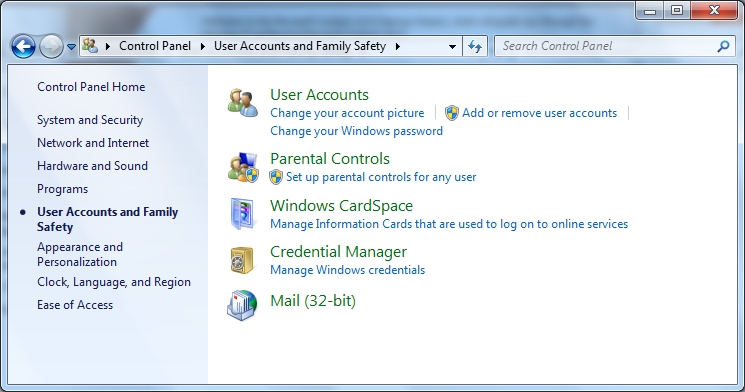
- If you are running Windows 7, select the User Accounts and Family Safety and then choose the Mail (32-bit) option at the bottom.
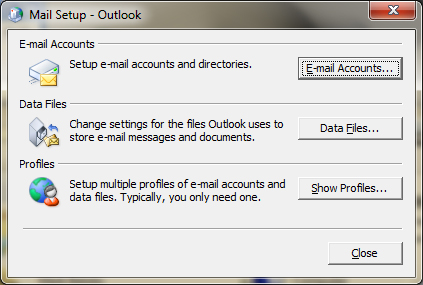
- Double-click on the Mail icon.
- Click on the Show Profiles... button.
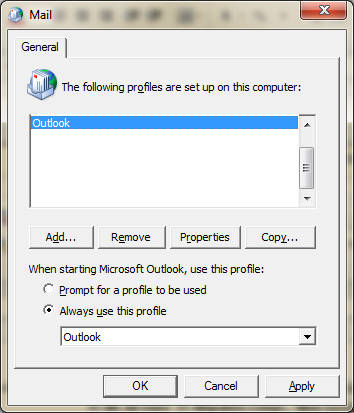
- Click on the Add...button.
- In the Profile Name field, type in: FASmail
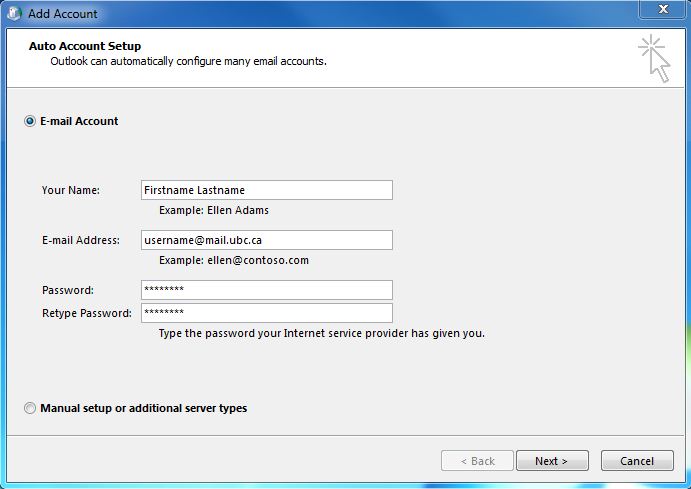
- Select E-mail Account and fill in the relevant information.
-
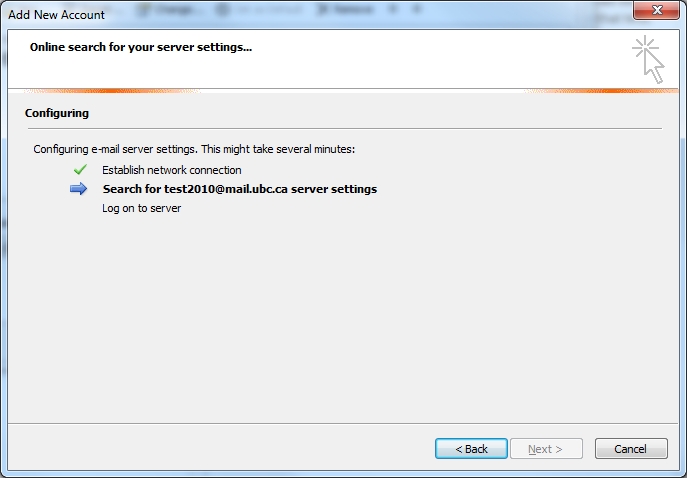
Click Next. It may take a minute or two while Autodiscover is finding your account settings.
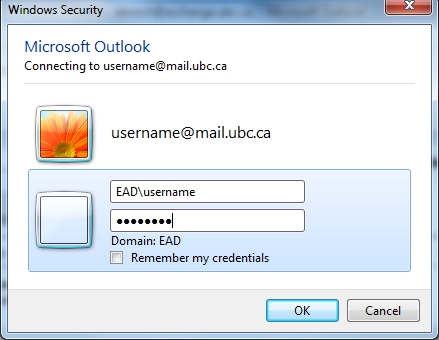
- A login box will appear:
- Important Note: The username will initially be set to your email address. You will need to change this.
- If you use Windows 7, you will need to click "Use another account".
- For User name, change it to: EAD\username
- ...where username is your FASmail/CWL username.
- For Password, type in your assigned FASmail/CWL password.
- Click OK.
-
- It may take about 10 - 20 seconds to verify your information. Once the verification has been completed, on the Exchange Server Settings screen, you will see your full name in the User Name field.
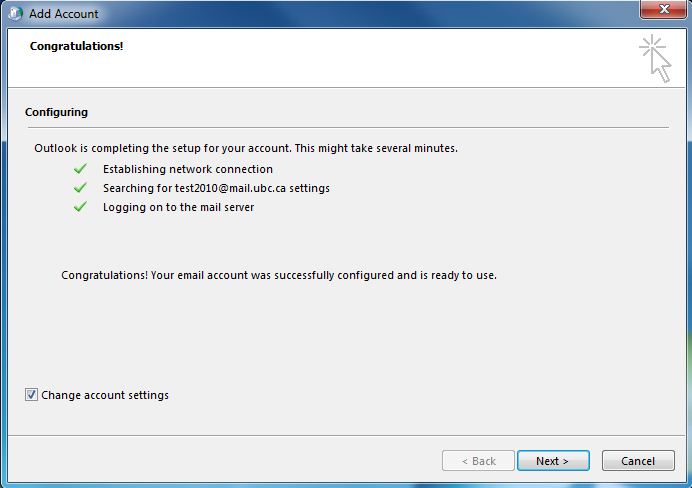
- A screen should appear saying Congratulations!
- Check the Manually configure server settings checkbox and click the Next
- Ensure that the Use Cached Exchange Mode checkbox is selected and choose the amount of mail to keep offline. The recommended time is 3 months.
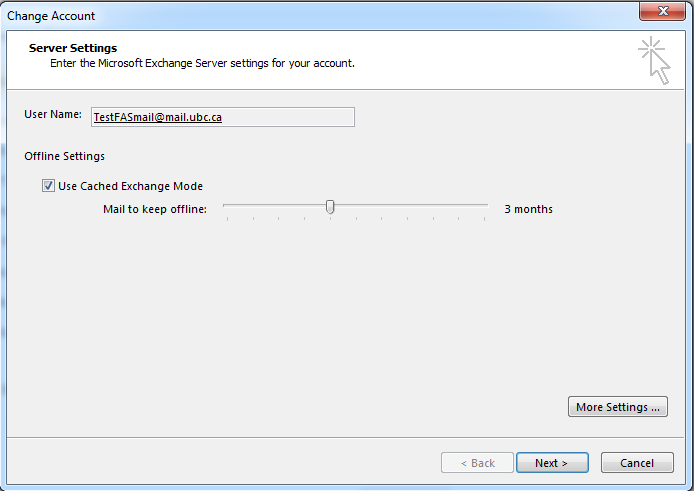
- Click on the More Settings... button.
- Click on the Connection tab.
- Click on the Exchange Proxy Settings... button.
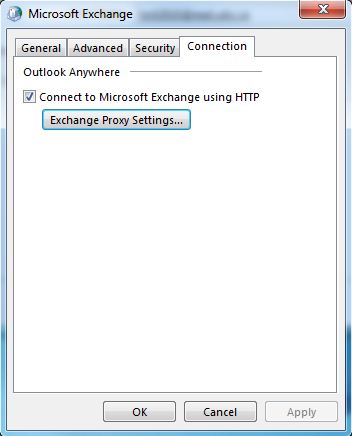
- Ensure that all checkboxes are selected including "On fast networks, connect using HTTP first, then connect using TCP/IP"
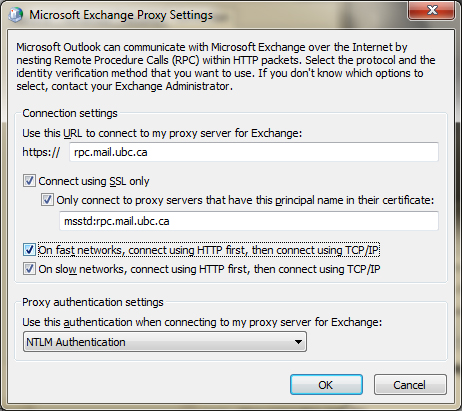
- Click OK.
- Click on the Security tab.
- Select "Always prompt for logon credentials"
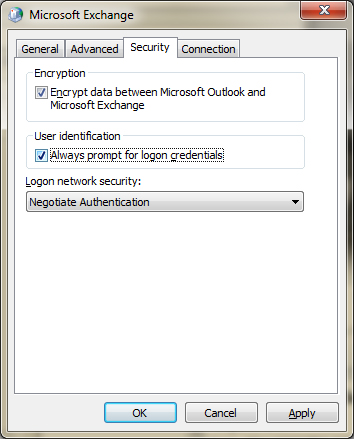
- Click OK.
- Click Finish.
- This should take you back to the Mail Profile screen. There should now be a FASmail entry in the profile list.
- In the lower half of the window, click on "Always use this profile", select FASmail and then click on "Prompt for a profile to be used".
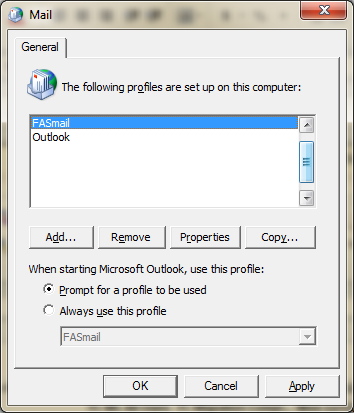
- Click OK.
- Your FASmail account should now be setup. Close Outlook 2013, if it is currently open.
- Open Outlook 2013.
- You may be prompted for your Exchange password. If so, type in your assigned FASmail password and click OK.
- You should now be able to access your FASmail mailbox. Please note that it may take some time to download emails depending on your mailbox size and connection speed.
