This document explains how to configure an Android device with your UBC FASmail account to access your calendar, contacts, and email.
These instructions are based on configuration using a Google Nexus 4 (Jelly Bean 4.2.1.) Specific instructions may vary depending on the phone and operating system version.
Important notes
- UBC IT does not provide support for Android setup/installation. This document is provided as a general reference only.
- FASmail will enforce the Mobile Access to Services and Data Standard for information security. Specifically, FASmail requires that mobile devices must be:
- Protected with a PIN/password of at least five characters, unless limited by the device OS
- Configured to lock the screen automatically, after no more than 30 minutes of inactivity, with password protection
- Encrypted via device level encryption
- Configured such that they can be remotely wiped in the event of loss or theft
- Please do not proceed with these setup instructions unless you are able to commit the new required 5-character/digit passcode to memory.
Prerequisites:
- access to internet
- your phone/device has to have a password that is at least five characters long (to set it up: Go to Settings, Security, Set up/Change password)
- Go to Settings.
- Under Accounts, select Add account.
- Select Corporate.
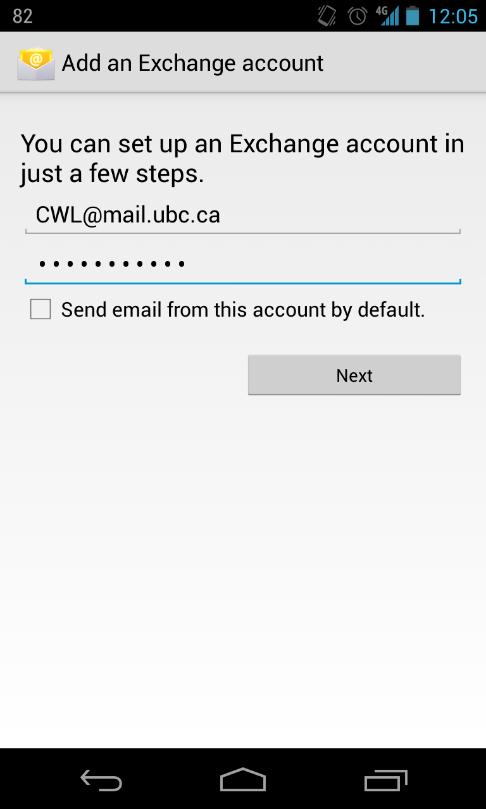
- In the Email address field, enter: cwl@mail.ubc.ca.
- Where cwl is your Campus-Wide Login username.
- In the Password field, enter in your CWL password.
- Select Next.
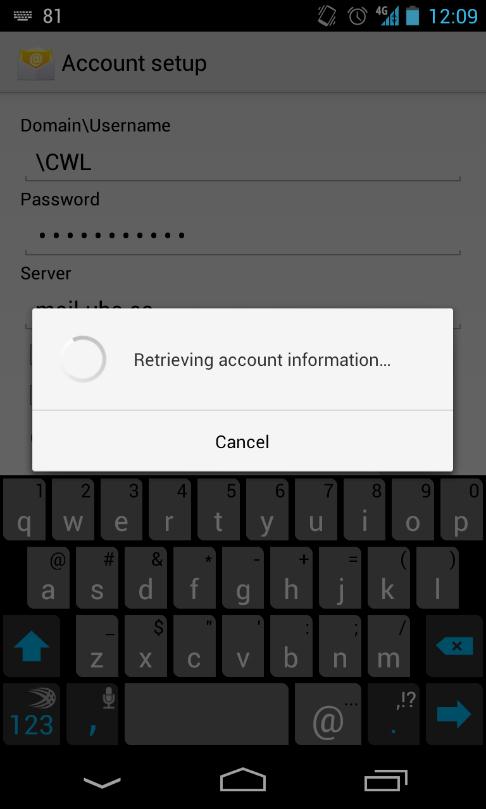
- When the window appears that says "Retrieving account information…" select Cancel.
- In the Domain: user name field, enter: EAD\cwl
- ... where cwl is your Campus-Wide Login username.
- In the Password field, enter in your CWL password.
- In the Exchange server field, enter: activesync.mail.ubc.ca
- Place a checkmark next to Use secure connection (SSL)
- Place a checkmark next to Accept all SSL certificates
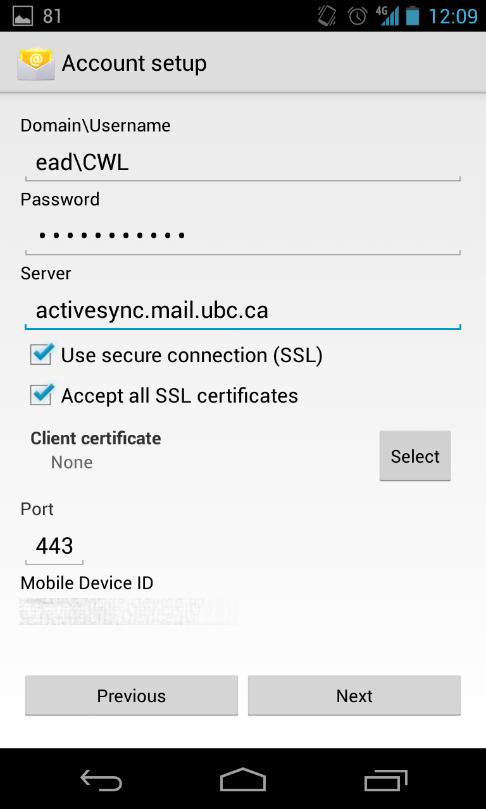
- Select Next.
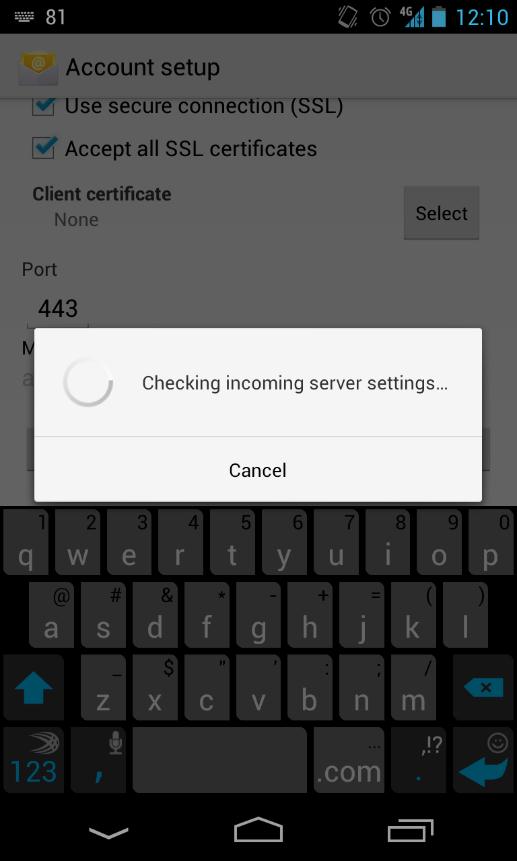
- Wait for your phone to check incoming server settings.
- When asked the Remote security administration question, select OK.

- Under Account settings, choose which features you would like to sync (Email, Contacts, Calendar). If you want to make this your default sending account, ensure that "Send email from this account by default" is selected.
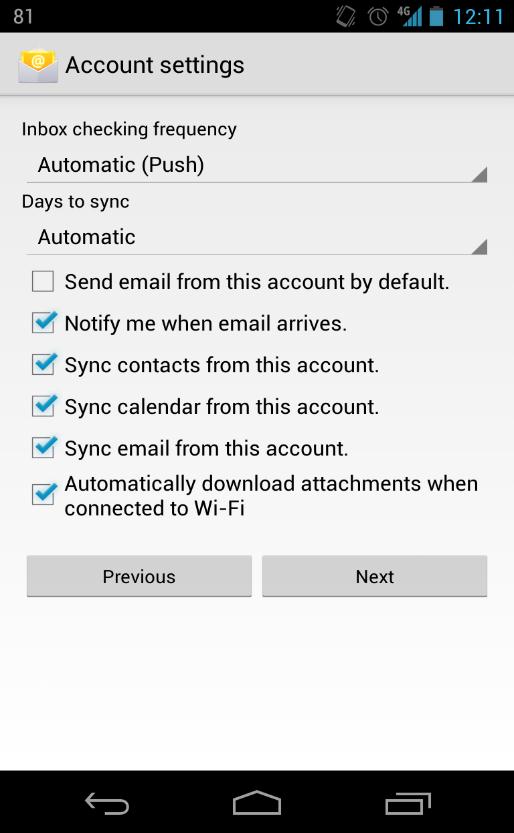
- Select Next.
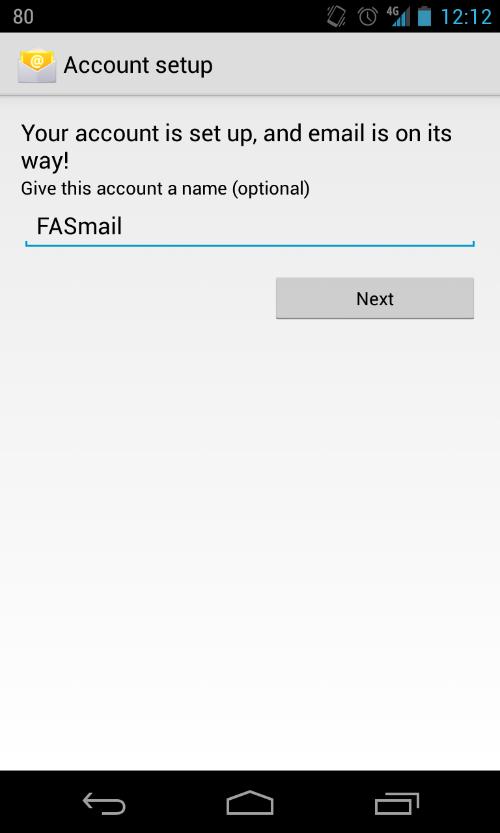
- Under Give this account a name (Optional), type: FASmail.
- Select Done.
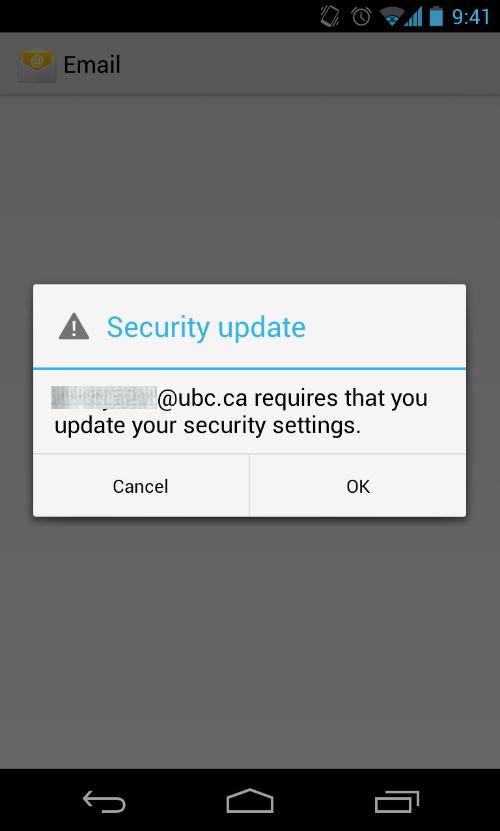
- When the security update popup appears, select OK.
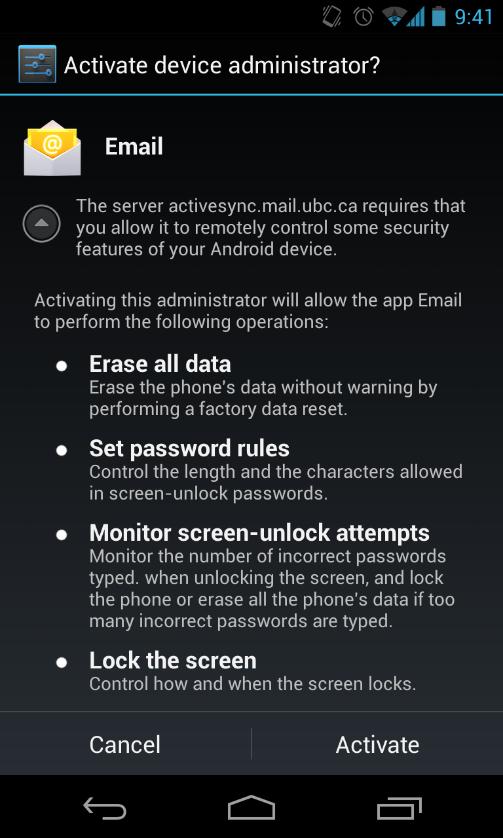
- Android gives you a summary of what "Activating device Administrator" means.
- Review conditions and select Activate.
- Your Android device is now configured for use with UBC FASmail.
