
UBC offers a secure wireless network that can be accessed by WPA2 Compliant Cards. Please use the Autoconnect Utility or follow the manual setup procedure listed below to enable WPA2 for your wireless adapter. If you have any problems please contact us .
Requirements
- Windows XP SP2 (Service Pack 2) or later, or Windows XP SP1 (Service Pack 1) with WPA2
patch
- You can download these by using the Windows Update tool or visiting Windows Update .
- A wireless card with drivers that support WPA2 and PEAP (Protected Extensible Authentication Protocol). Please see your manufacturer's website for information as well as the newest updates, drivers, and firmware regarding your wireless card. A list of cards some that should work are listed on the secure wireless page . Most wireless cards do support WPA2 and PEAP .
- Important: Get updated drivers from your manufacturer.
Enabling WPA2 Authentication and Security
-
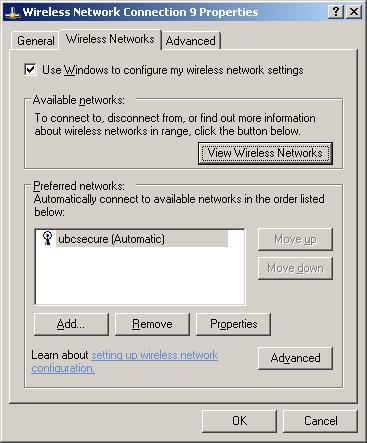
Click the Start button at the bottom, then select Control Panel , then Network Connections and right click on your wireless network card and select Properties . Click on the Wireless Networks tab.
-
Click Add at the bottom. And enter the following information:
Network name (SSID) : ubcsecure
Network Authentication : WPA2 (note: WPA2 and WPA2-PSK are not the same and selecting WPA2-PSK will not allow the connection to operate properly)
Data Encryption : AES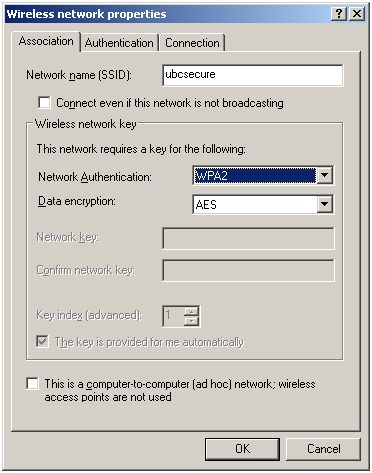
-
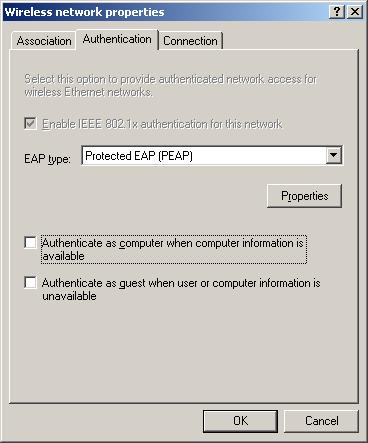
Select the Authentication tab. For EAP Type select Protected EAP (PEAP) , then uncheck and turn off Authenticate as computer when computer information is available.
-
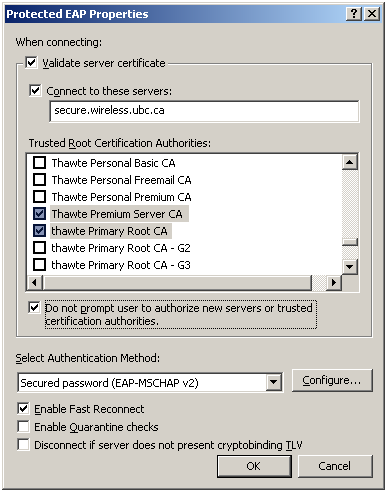
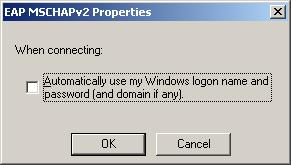
Click the Properties button and check the Connect to these servers box and enter secure.wireless.ubc.ca. Under Trusted Root Certificate Authorities scroll down and select the Thawte Primary Root CA certificate. Place a check mark next to Do not prompt user to authorize new servers or trusted certification authorities and click the Configure button at the bottom. Uncheck and turn off Automatically use my Windows login name and password.
-
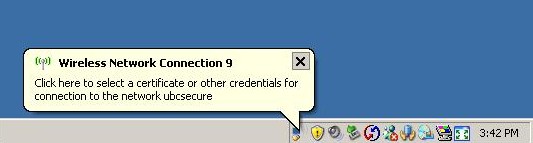
Click OK buttons and close any Windows to exit the configuration. In a few seconds, the network card will contact the "ubcsecure" network. Click the bubble at the bottom right hand corner to login.
-
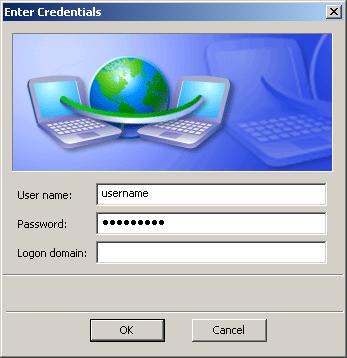
Enter your Campus Wide Login (CWL) user name and password . Then click OK .
-
The wireless card will authenticate with the network. You should now be connected to the WPA2 enabled, UBC Secure Network.
