This document explains how to set up Outlook 2010 for UBC FASmail using RPC over HTTPS. This method of accessing your FASmail account does not require you to connect to UBC's VPN service everytime you want to check your FASmail email. However, it does required a connection to VPN when you first set it up. This may be useful for customers who need to connect to their FASmail accounts from a network which does not allow a VPN connection to be established or those who want the added convenience of not having to log in to VPN to check email.
- Please make sure that your computer is connected to the Internet.
- If you are off-campus or are using the on-campus wireless network, you will need to be connected to UBC's VPN service while following the instructions below. Once these instructions have been completed, you will be able to access your FASmail account without connecting to VPN. Please follow the instructions in our VPN setup documents to set up VPN access on your computer.
- Open Outlook 2010.
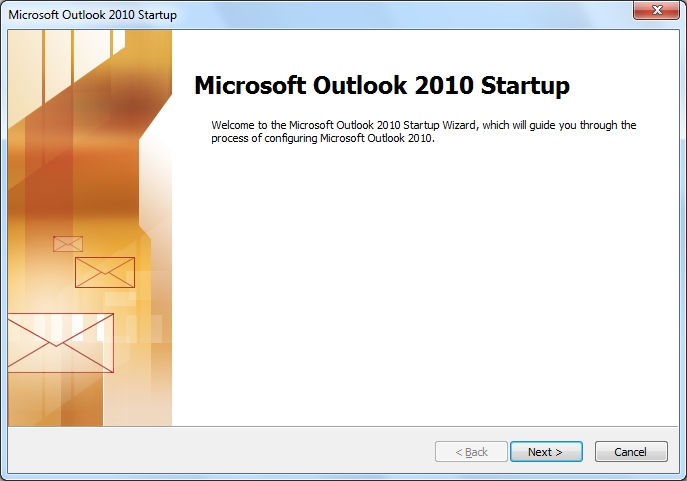
- If you see an Outlook 2010 Startup screen:
- Click Next .
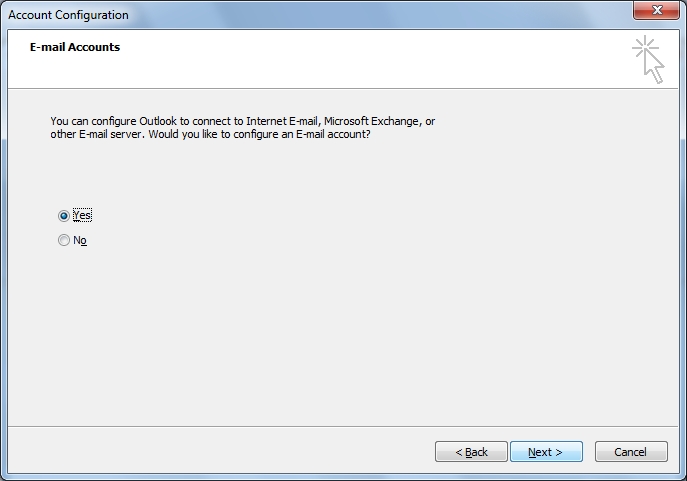
- When Outlook asks you if you would like to configure an E-mail account, click Yes , and then Next .
- Proceed to Step 9.
- Click Next .
- If you do not see an Outlook 2010 Startup screen:
- Close Outlook.
- Proceed to Step 3.
- If you see an Outlook 2010 Startup screen:
- Click on the Start button and then click on Control Panel.
- On certain computers, the Control Panel link is located within the Settings menu.
- Locate the Mail icon in the Control Panel window.
- If you do not see this icon, click on the Classic View or the Switch to Classic View link, located on the left-hand side of the Control Panel window, and look for the icon again.
- If you are running Windows 7, select the User Accounts and Family Safety and then choose the Mail (32-bit) option at the bottom.
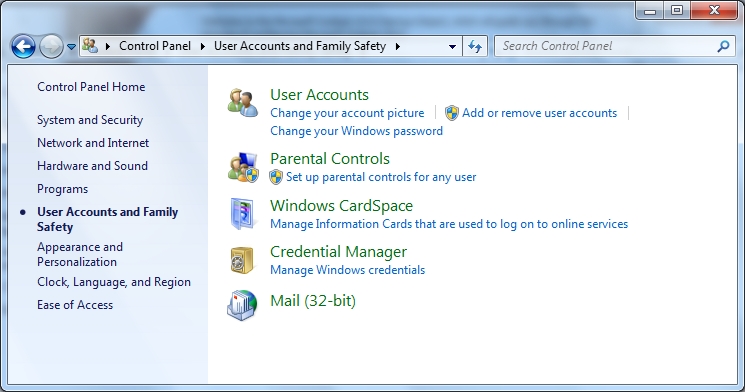
- Double-click on the Mail icon.
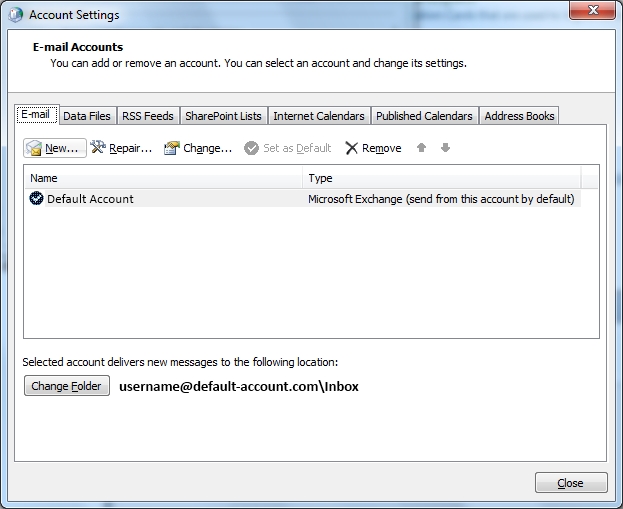
- Click on the E-mail Accounts button.
- On the E-mail tab, click on the New... button.
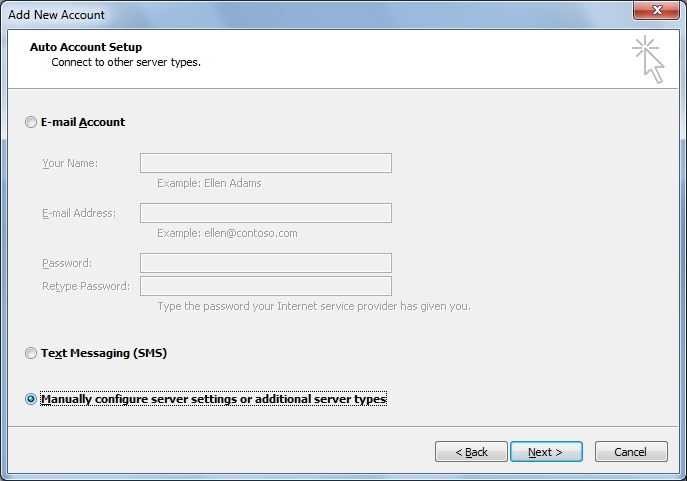
- Select Microsoft Exchange, POP3, IMAP, or HTTP and click Next.
- Place a checkmark next to Manually configure server settings or additional server types and click Next.
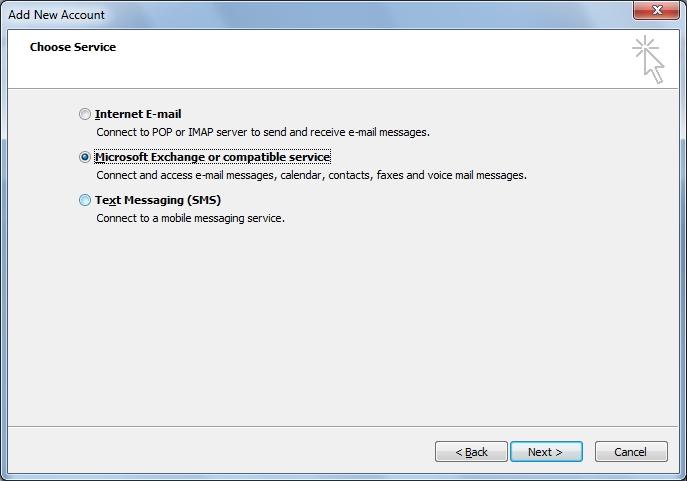
- Select Microsoft Exchange and click Next.
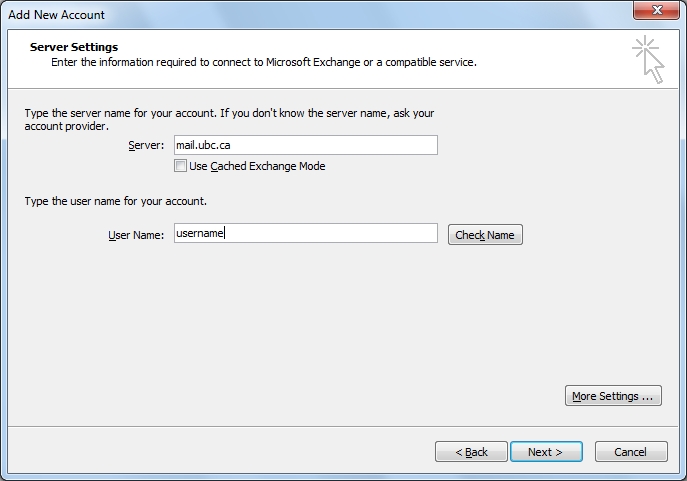
- On the Server Settings page:
- Enter the following in the Server field: mail.ubc.ca
- Ensure that Use Cached Exchange Mode is unchecked.
- Using Cached Exchange Mode does speed up access to your mailbox and also allows you to view your e-mail offline, but there are some known issues relating to updating Address Book entries, so we recommend leaving this option unchecked until Microsoft releases a patch to fix this issue.
- For User Name , type in your assigned FASmail username.
- Click on Check Name .
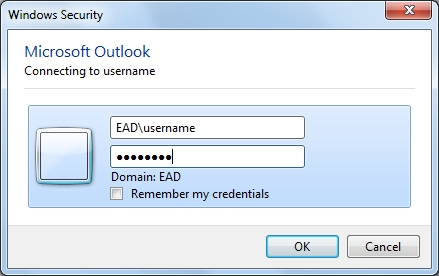
- If a login box appears:
- For User name , type: EAD\username
- ...where username is your assigned FASmail (CWL) username.
- For Password , type in your CWL password.
- Click OK.
- It may take about 10 - 20 seconds to verify your information. Once the verification has been completed, on the Exchange Server Settings screen, you will see your full name in the User Name field.
- For User name , type: EAD\username
- Click the More Settings ... button.
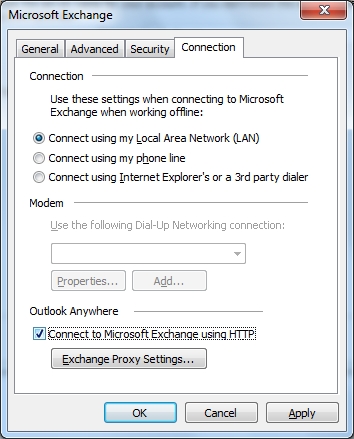
- On the Microsoft Exchange screen:
- Click on the Connection tab.
- Place a checkmark next to Connect to Microsoft Exchange using HTTP
- Click the Exchange Proxy Settings... button.
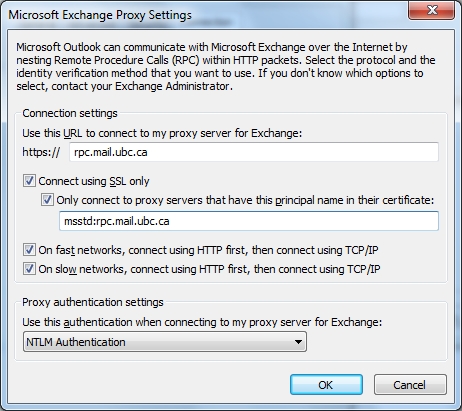
- On the Microsoft Exchange Proxy Settings screen:
- For Use this URL to connect to my proxy server for Exchange , enter: rpc.mail.ubc.ca
- Ensure that Connect using SSL only is checked.
- Place a checkmark next to Only connect to proxy servers that have this principal name in their certificate, then type in: msstd:rpc.mail.ubc.ca
- Place a checkmark next to On fast networks, connect using HTTP first, then connect using TCP/IP.
- Ensure that On slow networks, connect using HTTP first, then connect using TCP/IP is checked.
- For Use this authentication when connecting to my proxy server for Exchange , select NTLM Authentication .
- Click OK to return to the Microsoft Exchange screen.
- Click OK again to return to the Microsoft Exchange Settings window.
- You may receive a message stating that you must restart Outlook for these changes to take effect. If so, click OK .
- Click Next .
- You may receive a message stating that, by adding a Microsoft Exchange account, you have changed where some of you new e-mail messages and calendar information is saved. If so, click OK
- Click Finish .
- You may be prompted for your password. If so, type in your CWL password and click OK .
- If you now see the E-mail Accounts screen, click Close , and then click Close again.
- Close Outlook 2010, if it is currently open.
- If you are connected to UBC's VPN service, please disconnect from the VPN.
- Open Outlook 2010.
- You may be prompted for your CWL password. If so, type in your assigned password and click OK .
- You should now be able to access your FASmail mailbox using RPC over HTTPS.
