This document explains how to set up Windows Mail in Microsoft Vista for UBC FASmail using Secure POP (POPS).
Please note that Windows Mail does not support the full suite of services that Outlook provides such as Calendaring, Task Lists, Notes, etc... Only Microsoft Outlook, Entourage and Mac Mail applications support these features.
Please note that if you currently use Windows Mail to access email from multiple accounts, please contact your Departmental Network Administrator for assistance. The instructions below are for those who are setting up Windows Mail for FASmail only.
- Open Windows Mail: Go to Start > All Programs > Windows Mail.
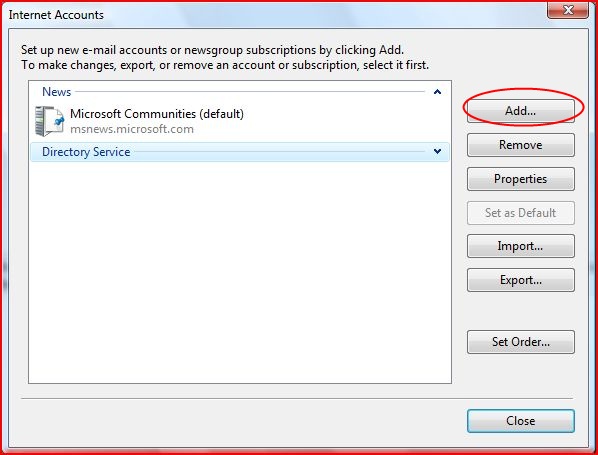
- If this is your first time using Windows Mail, an email account setup wizard should appear. Otherwise, pull down the Tools menu and select Accounts. Click on Add to add a new account.
- Select E-mail Account and click Next.

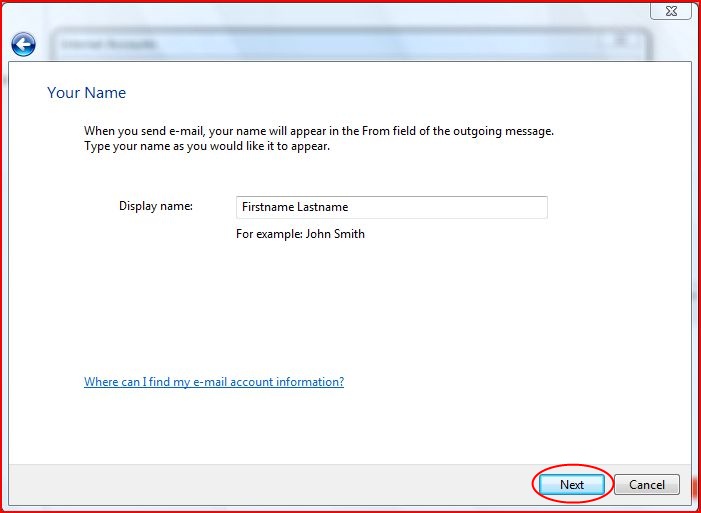
- Enter your first and last name in the Display name field. Click Next to continue.
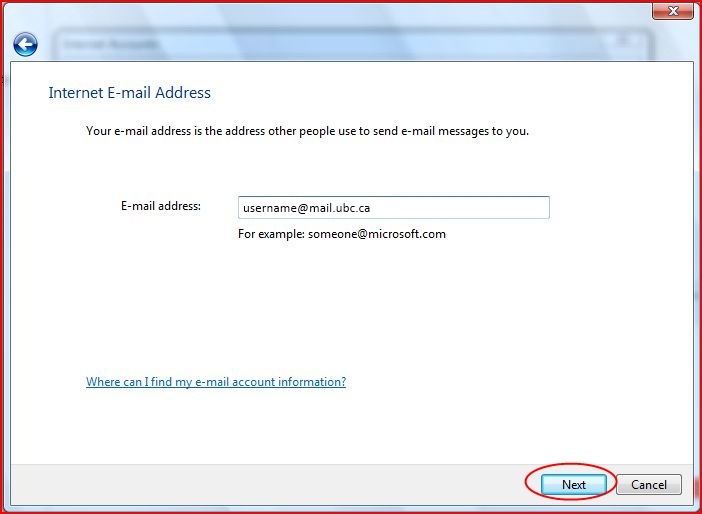
- Type your E-mail address, then click Next to continue.
- Your E-mail address is username@mail.ubc.ca where username is your FASmail (CWL) username.
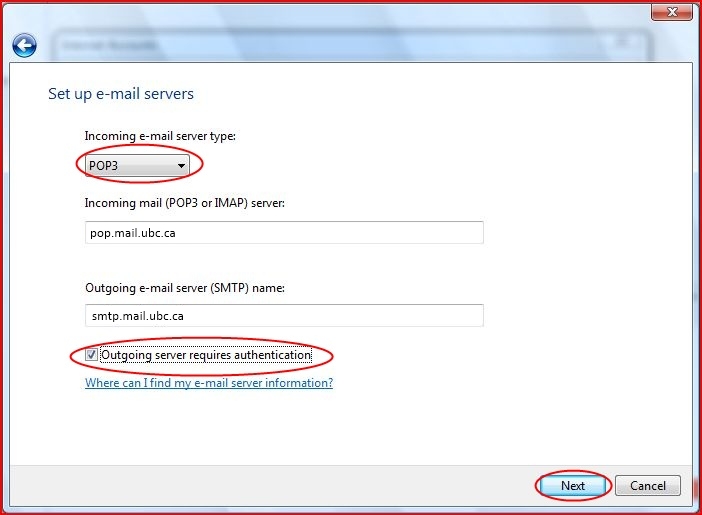
- In the Set up e-mail servers window:
- For your incoming e-mail server type, select POP3 from the drop down menu.
- If you are at UBC Vancouver:
- The Incoming mail (POP3) server should be set to pop.mail.ubc.ca
- The Outgoing mail (SMTP) server should be set to smtp.mail.ubc.ca
- Place a checkmark next to Outgoing server requires authentication.
- Click Next to continue.
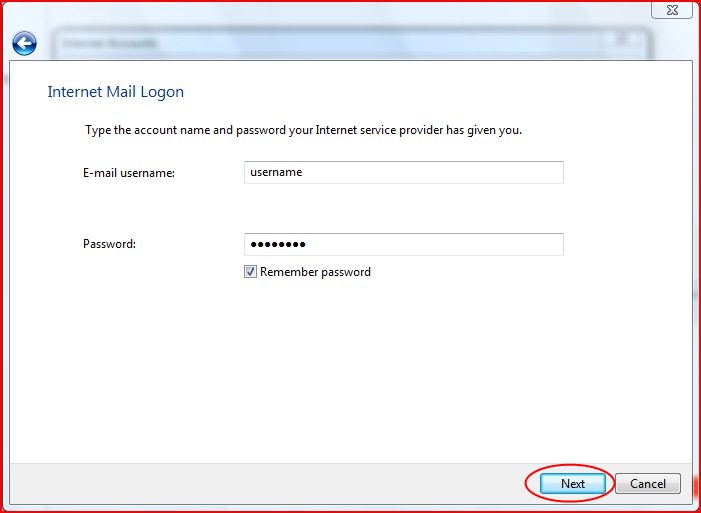
- In the Internet Mail Logon window:
- In the E-mail username field, type in your FASmail (CWL) username.
- In the Password field, type in your CWL password and place a checkmark next to Remember password.
- Click Next to continue.
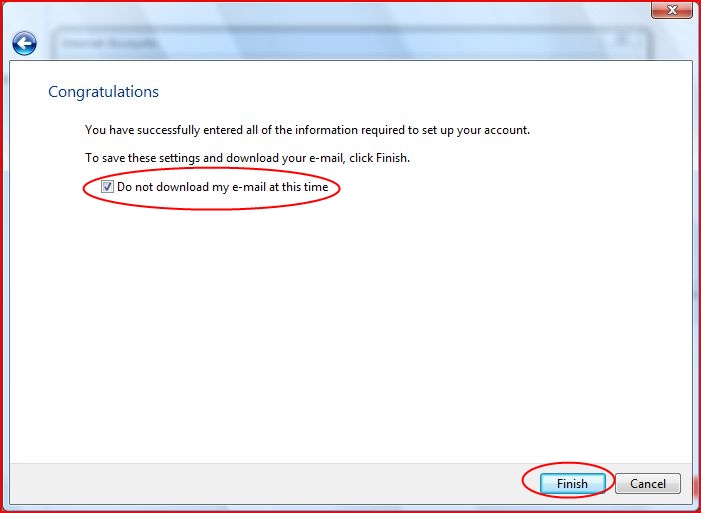
- In the Congratulations window:
- Place a checkmark next to Do not download my e-mail at this time.
- Click Finish to continue.
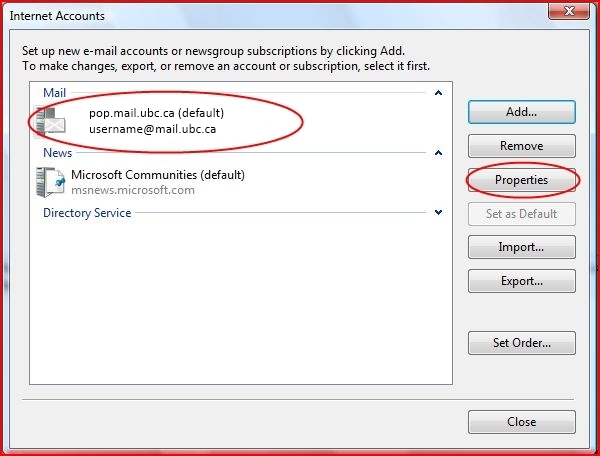
- In the Internet Accounts window:
- Click on pop.mail.ubc.ca (default).
- Click Properties.
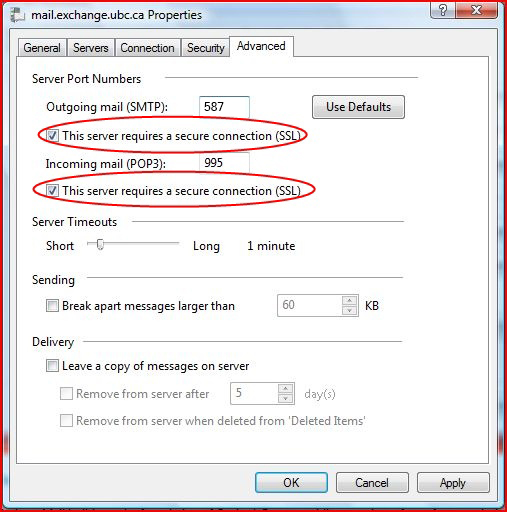
- Click on the Advanced tab
- Under Outgoing mail (SMTP), check the box beside This server requires a secure connection (SSL).
- Change the number next to Outgoing mail (SMTP) to 587.
- Under Incoming mail (POP3), check the box beside This server requires a secure connection (SSL).
- The number in the box next to Incoming mail (POP3) server should automatically change to 995. If it doesn't, change the number in this box to 995.
- If you access your email from more than one location, or if you wish to keep a copy on the server, check the box next to Leave a copy of messages on server.
- Note: If you check this option, it will download your messages to your computer but it will also keep copies on the mail server. Since you have a mailbox limit for messages on the server, you will occasionally have to log into FASmail Webmail at https://www.mail.ubc.ca to clear out these messages. This will ensure that you do not exceed your mailbox quota.
- Click OK to apply your settings.
- Click Close.
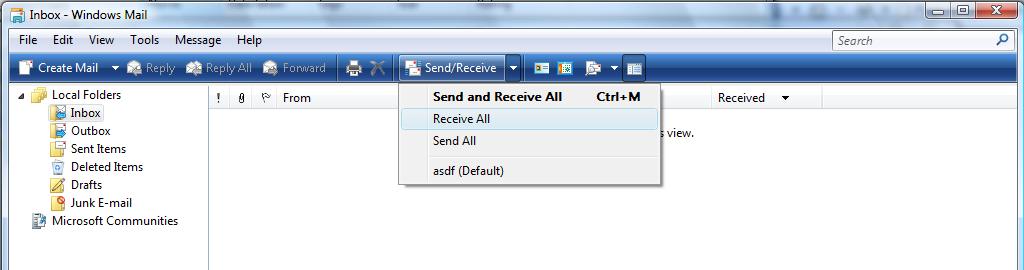
- Click on the down arrow on the right of Send/Receive. Click on Receive All to retrieve your emails.
- A popup window may inform you that junk/phishing emails have been moved to the Junk E-mail folder. If you get this message, click Close to continue.
- Be sure to check your Junk E-mail folder occasionally to ensure that legitimate emails doesn't get filtered out.
- Windows Mail is now set up for use with FASmail using Secure POP.
